
Getting Started with API Testing in TestGrid
Overview
TestGrid API Testing enables users to test, validate, and manage APIs directly from the TestGrid platform without relying on external tools. The interface is designed to provide a seamless experience similar to popular API testing platforms like Postman, allowing users to quickly execute API requests, inspect responses, and manage API collections within a unified environment.
Using TestGrid API Testing, users can:
- Send API requests using multiple HTTP methods
- Import API collections and cURL commands
- Add headers, query parameters, and request bodies
- Validate API responses in real time
- Perform API testing directly from the TestGrid UI
- Manage API workflows efficiently without switching platforms
Accessing API Testing in TestGrid
Step 1: Login to TestGrid
Log in to the TestGrid platform using your valid credentials.
After successful login:
- Navigate to the left-side navigation panel.
- Click on the API Testing section.
This will launch the TestGrid API Testing workspace.
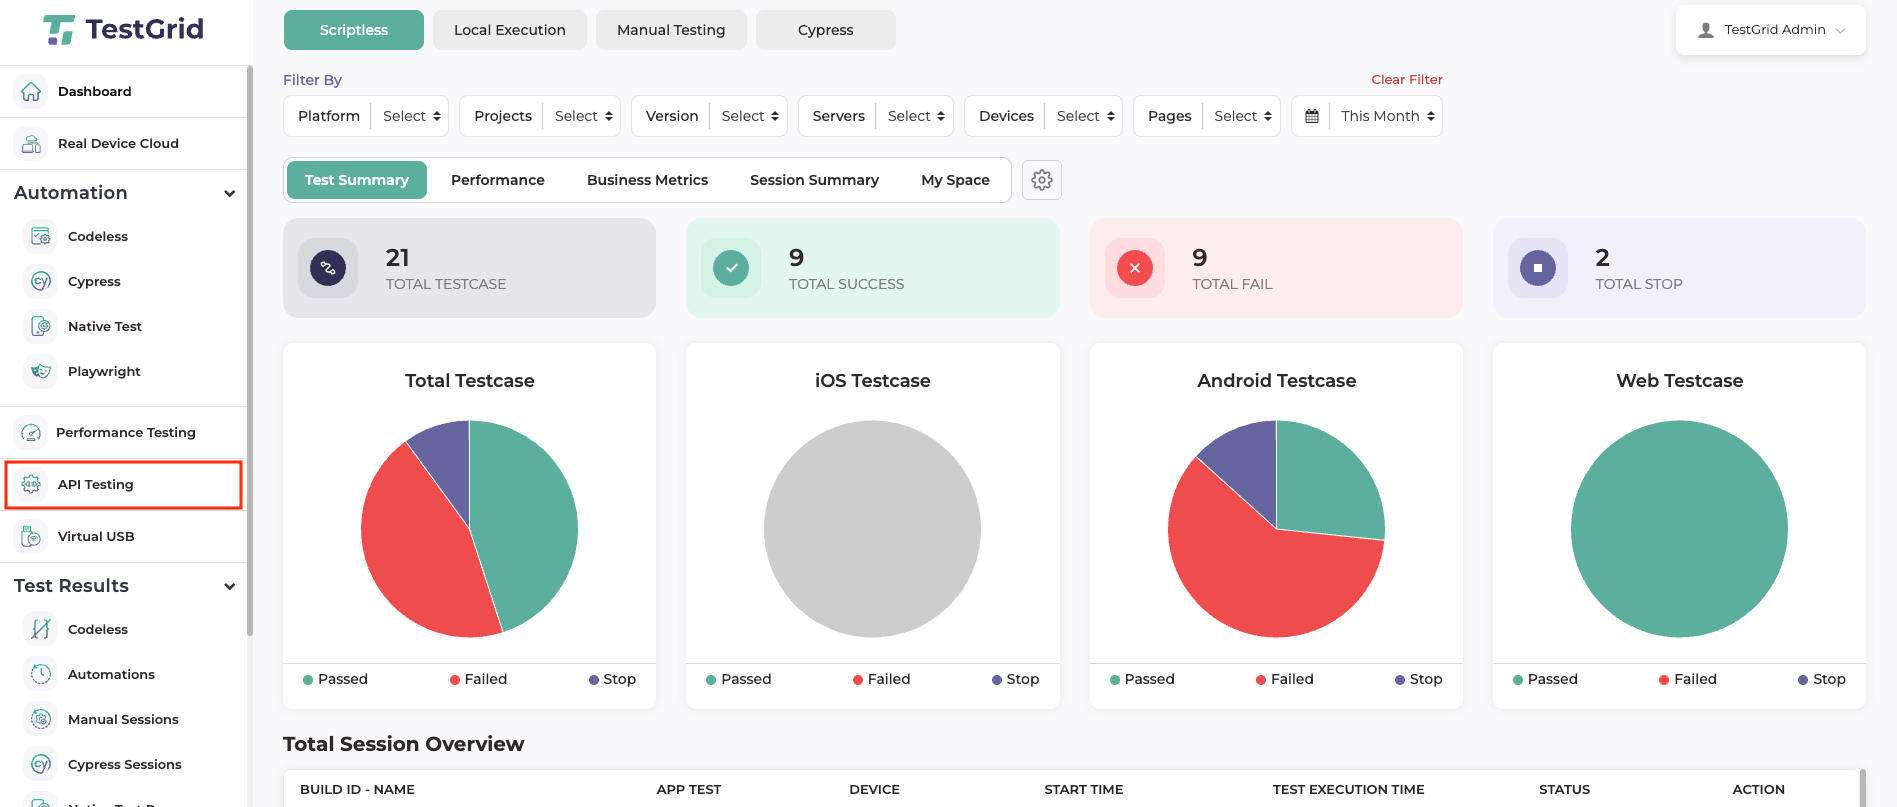
Step 2: Tap on the API Testing section. This will launch the API testing UI on the TestGrid.
-
Understanding the API Testing Workspace
The TestGrid API Testing interface is designed to provide a familiar and user-friendly experience similar to modern API testing tools.
The workspace allows users to:
- Paste and execute cURL commands
- Import API collections
- Configure request methods
- Add query parameters and headers
- Send API requests
- Inspect response data instantly
Key Features Available in the API Testing UI
Supported HTTP Methods
Users can execute APIs using standard request methods such as:
- GET
- POST
- PUT
- PATCH
- DELETE
Request Configuration Options
The API Testing UI allows users to configure:
- API endpoint URLs
- Query parameters
- Headers
- Authorization details
- Request payload/body
- Content types
Real-Time Response Viewer
After executing the API request, users can view:
- Response body
- Status code
- Response time
- Headers
- API execution results
Adding API Requests in TestGrid
Users can add API requests to the TestGrid workspace using multiple methods.
Method 1: Import Using cURL
- Copy the cURL command from your existing API tool or documentation.
- Paste the cURL directly into the cURL input section in TestGrid.
- TestGrid will automatically parse the request details and populate the API configuration.
This is the fastest method for quickly importing existing API requests.
Method 2: Import API Collections
Users can also import complete API collections directly into TestGrid.
Steps to Import Collections
- Click the Import button available in the API Testing workspace.
- Choose the preferred import method.
- Upload or import your API collection.
Supported import options may include:
- Postman Collection
- cURL File
- JSON Collection Files
Once imported, the API requests will be available inside the TestGrid workspace for execution and management.
Executing an API Request
After configuring the API request, follow the steps below to execute the API.
Step 1: Select HTTP Method
Choose the appropriate API request method:
- GET
- POST
- PUT
- DELETE
- PATCH
Step 2: Configure API Details
Add all required API details, including:
- Endpoint URL
- Query parameters
- Request headers
- Authorization tokens
- Request body/payload
Example:
Configuration Example Endpoint URL https://api.example.com/users Method POST Authorization Bearer Token Content-Type application/json
Step 3: Send the Request
Click the Send button to execute the API request.
TestGrid will process the request and display the response instantly in the response panel.
Viewing API Responses
Once the request is executed, users can inspect the API response directly within the TestGrid UI.
The response section displays:
- Response payload
- HTTP status code
- Execution duration
- Response headers
- Error messages (if any)
This helps users quickly validate API functionality and troubleshoot issues efficiently.

Why Use TestGrid API Testing?
Unified Testing Experience
Perform API testing directly within the TestGrid platform without using external applications.
Faster API Validation
Quickly test APIs using imported cURL commands and collections.
User-Friendly Interface
The UI is intuitive and designed for both technical and non-technical users.
Simplified Collaboration
Centralize API testing workflows within the TestGrid ecosystem for better team collaboration.
Best Practices for API Testing
To achieve reliable and efficient API testing, follow these recommendations:
- Use meaningful request names for easy identification.
- Validate response status codes after each request.
- Store reusable API collections for repeated testing.
- Organize APIs into logical groups or folders.
- Use authentication tokens securely.
- Verify both successful and failure responses.
Common Use Cases
TestGrid API Testing can be used for:
- REST API validation
- Backend service testing
- Regression API testing
- Authentication testing
- Integration testing
- Microservices testing
- Continuous API verification
Troubleshooting Tips
Invalid Response Error
- Verify the API endpoint URL.
- Ensure the correct request method is selected.
- Check authentication tokens and headers.
Authorization Failed
- Confirm API keys or bearer tokens are valid.
- Verify authentication permissions.
Request Timeout
- Check server availability.
- Verify internet connectivity.
- Retry the API request.
Conclusion
TestGrid API Testing provides a powerful and easy-to-use platform for executing and managing API tests directly from the TestGrid UI. With support for cURL imports, API collections, request customization, and real-time response validation, users can efficiently perform API testing without relying on third-party tools.
The familiar interface and enterprise-ready capabilities make TestGrid an effective solution for modern API testing workflows.