
Jira Integration With TestGrid
Overview
Jira, developed by Atlassian, is a leading enterprise project management tool designed to help teams plan, track, and manage their work efficiently. It provides a user-friendly interface with robust features for task management, sprint tracking, and project analytics. Both development and testing teams use Jira to monitor user stories, track progress, and collaborate effectively. In addition to project management, Jira offers powerful bug tracking capabilities, allowing teams to log, prioritize, and manage defects according to release schedules.
How Do You Create a TestGrid Account Integration With Jira?
Step 1: Log in to your TestGrid account.
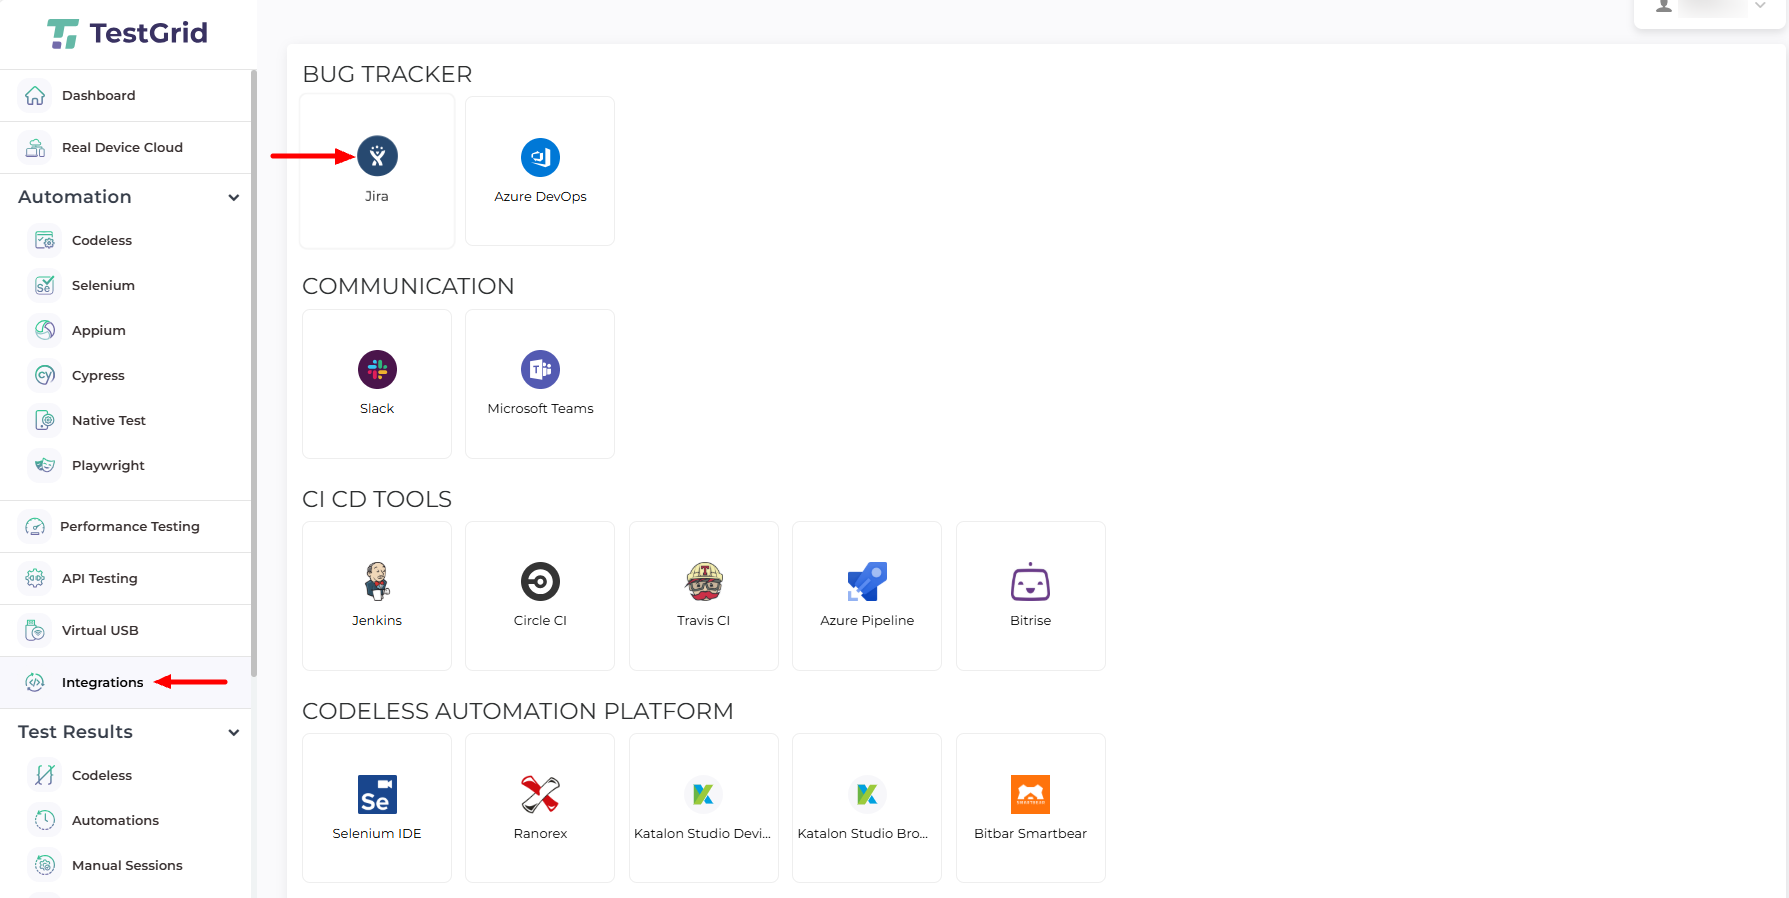
- After logging into the TestGrid platform with your valid credentials, navigate to Integration Tools from the left-hand panel. This will open the Integration Tools page, where you can view all available third-party integrations. Click on the desired integration tool, and you will see a list of supported third-party tools. From this list, select JIRA.
Step 2: Once you click Install, you will be sent to the screen shown below. To set up integration with Jira, enter your credentials in the fields that are marked.

- What is my Jira host?
Your Jira host is the domain name of your Jira workspace. To find it, log into your Jira dashboard and check the URL at the top of your browser. For example, inhttps://mysite.atlassian.net, the part in bold (mysite.atlassian.net) is your Jira host.
- What is my Jira email?
To sign in to your Jira account, use the email address associated with your Jira account.
- What is an API token?
An API token allows secure communication between two applications by verifying the user’s identity from one server to another. It ensures data integrity and security when accessing user-owned resources. API tokens are especially important for applications that require two-step verification.
Important: To link JIRA with TestGrid, you must generate an API token with administrative access.
Step 3: Generate an API Token (For Cloud Jira Only).
Visit https://id.atlassian.com/manage-profile/security/api-tokens for more information.
From the left-hand menu, navigate to API tokens, then click Create API token to generate the access key. This API token is required to authenticate and validate your user identity on the TestGrid server when accessing user-owned resources configured on the Jira server provided by Atlassian.
Notes: API tokens are only required for Jira Cloud instances. & If you are using a self-hosted (on-premise) Jira instance, API tokens are not required.

Step 4: After entering the label, press the “Create” button. Choose a label that is easy to remember because your API token will be derived from it. Remember that your API token is as important as your password!

Step 5: Copy and Manage Your API Token
After generating the API token, click Copy to clipboard to save it securely. You will need this token for future authentication.
If you forget to copy the token or lose it, there is no cause for concern—you can generate a new API token at any time by creating one with a new label. If you suspect that an API token has been compromised or misused, you can revoke the corresponding token directly from the token management page.

Step 6: Complete Authentication and Proceed.
Paste the generated API token into the appropriate field in TestGrid, then click Next to continue.
If you are using a self-hosted Jira instance, enter your Jira Personal Access Token (PAT) instead of an API token. Ensure that all required fields are completed before proceeding.
Step 7: After entering your credentials in the fields that are marked, you will see the Select Project window.
- Select your project Click on integrate projects and install.
- You will see a successful Popup on the screen after selecting Integrate Projects and installing.

Step 8: In my integration, you will see your account integrated with Jira.

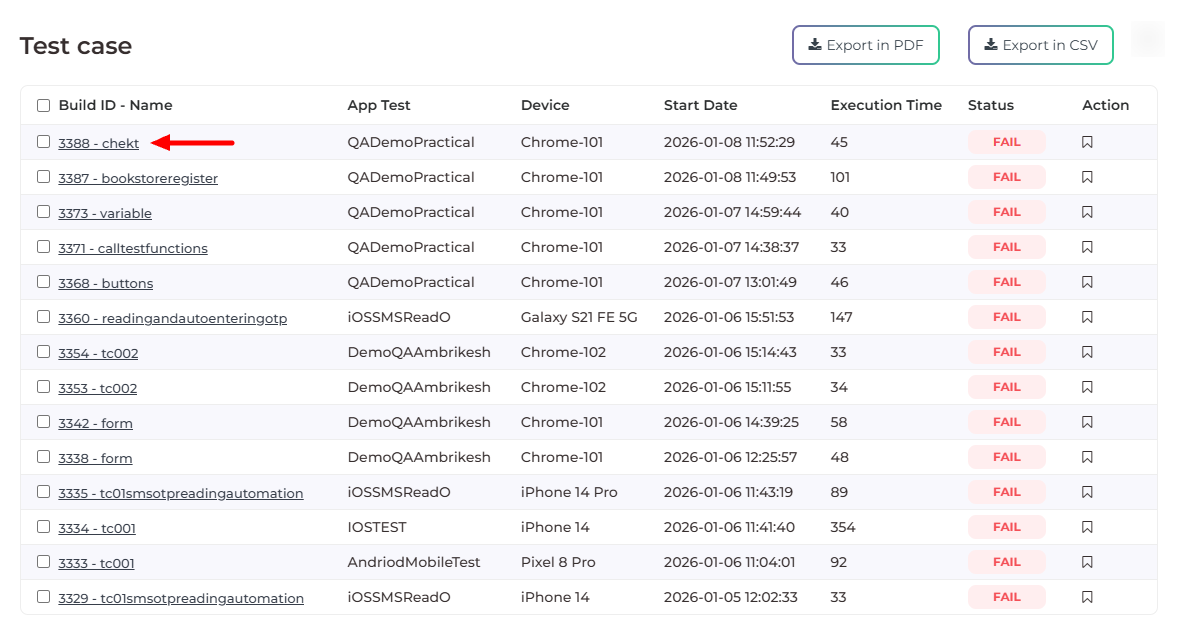
Step 9: Navigate to the dashboard and then select Fail test cases.

Once you click on Test cases, you will see the failed test cases screen, and then click on one of the test cases.
How to Log Your First Bug Through Jira Integration?
Step 1: After clicking on the test cases, you will see the mark bug on the left side of the screen.
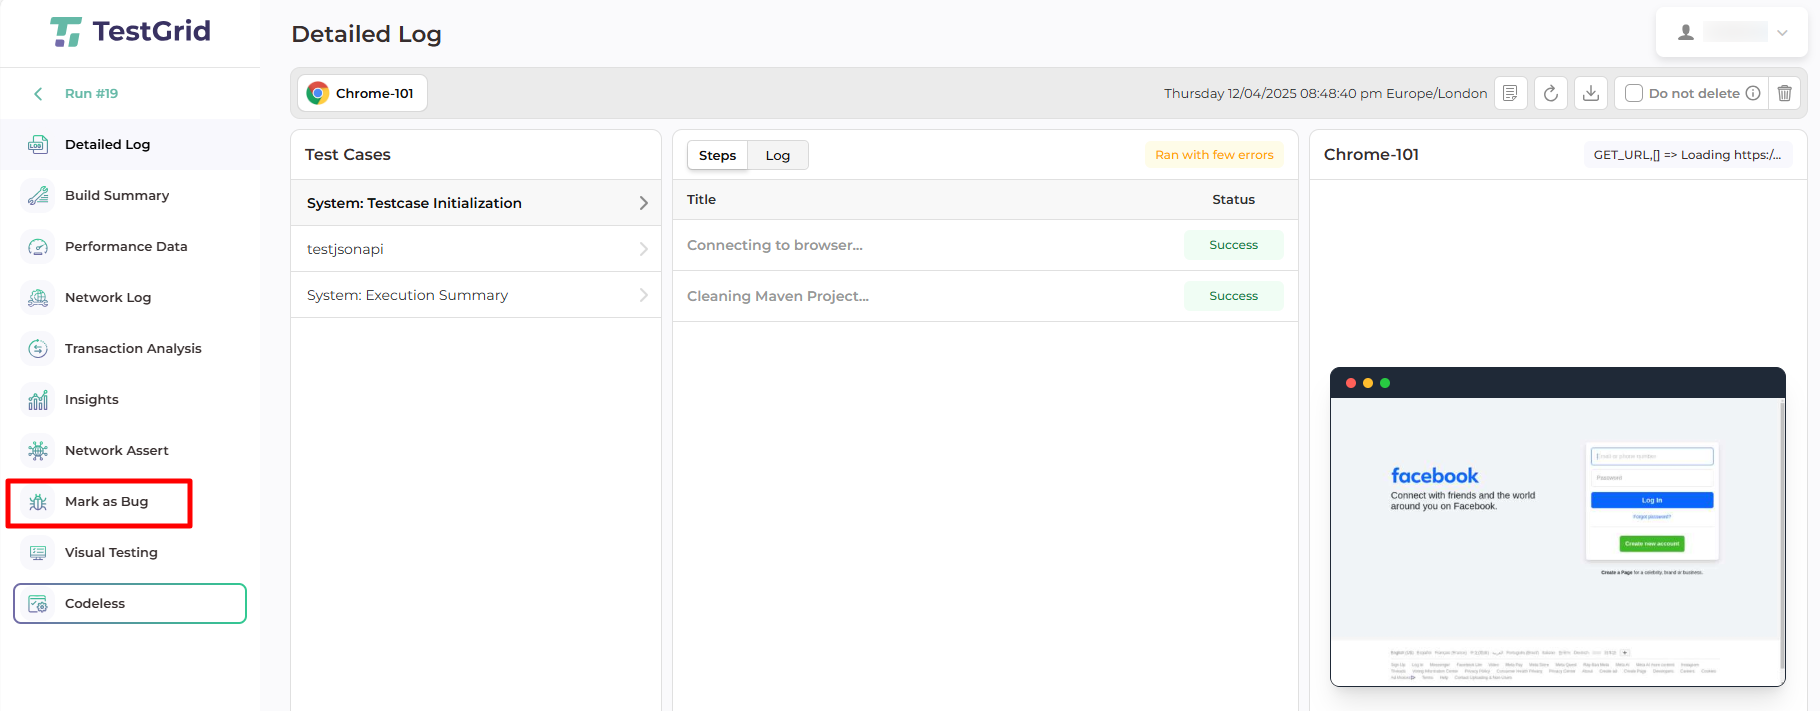
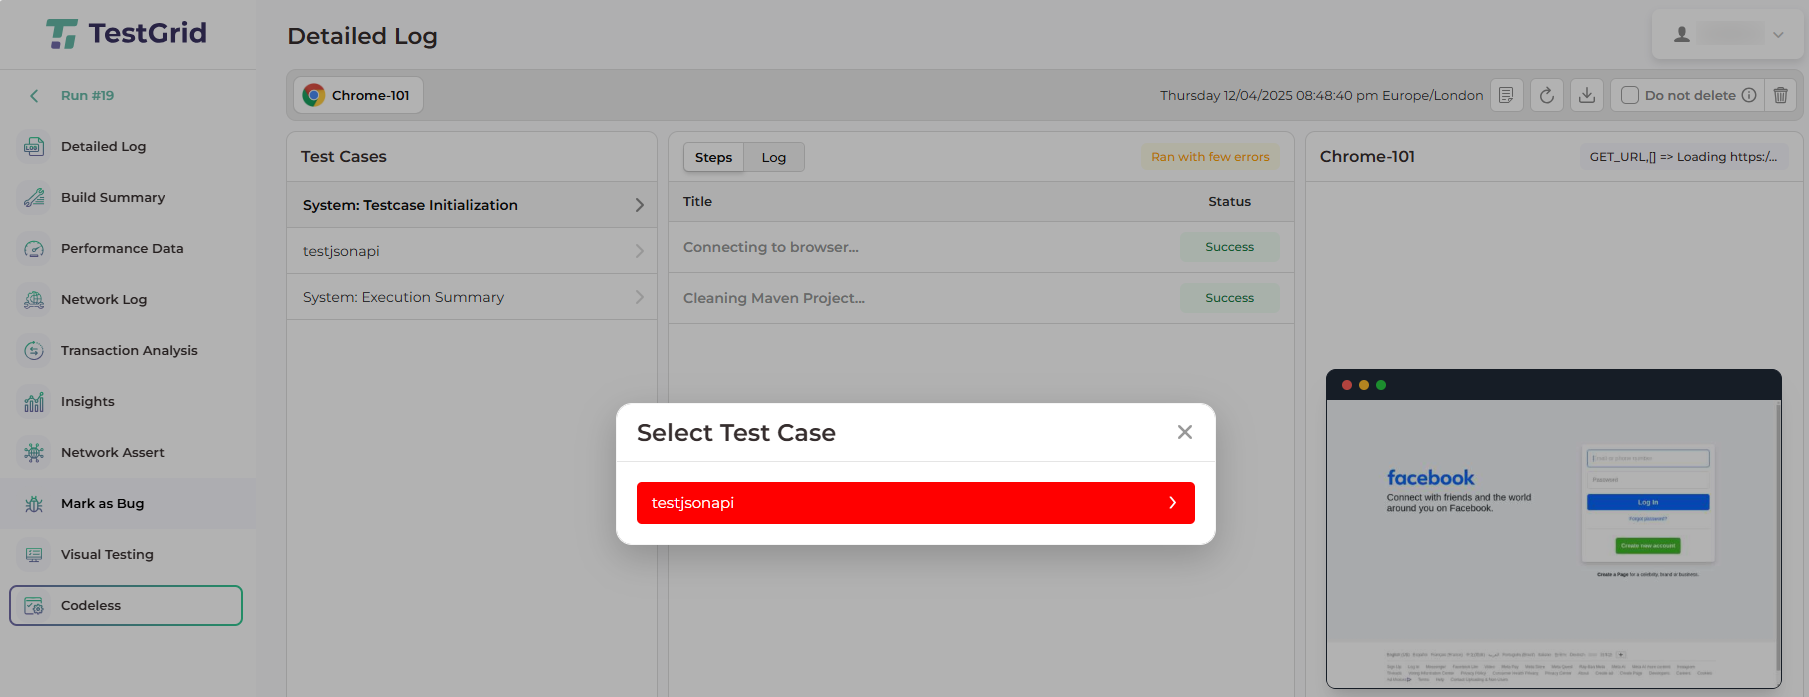
Step 2: Click on the Mark as a bug, and you will see the Select Test Screen window.
- Once the select test screen appears, click on the test cases.
- After clicking on test cases, you will see the Select Integration Tool window, and then you can select Jira as an integration tool.
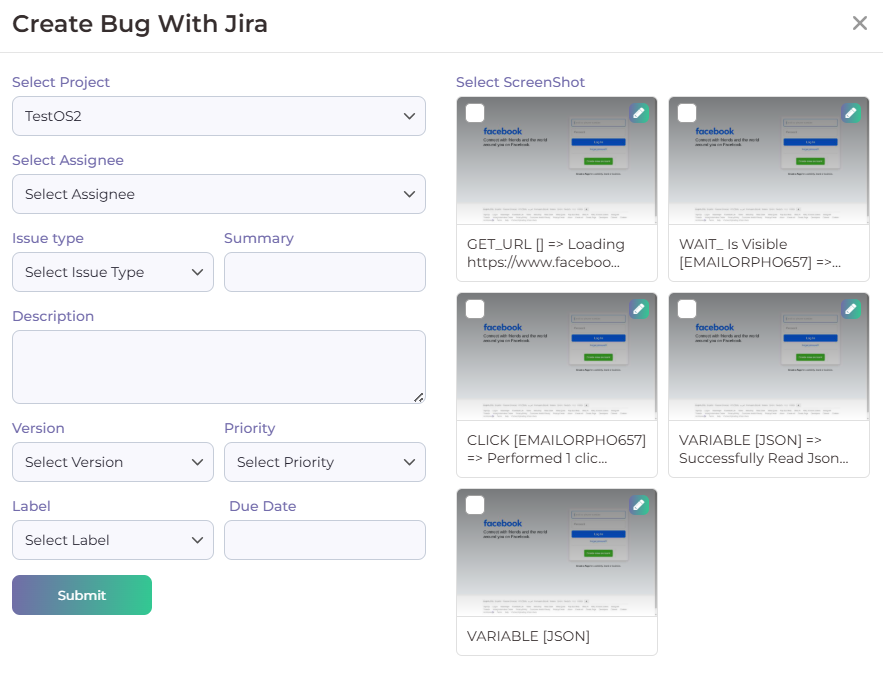
- Once you click on Jira, you will see the Create bug with Jira window appear; then select the project.
Step 3: After clicking on the selected project, you will see the Create bug-related field, so you can enter the appropriate information in that field.
- Once you enter the appropriate information in the required field, select Screenshots on the right side of the screen.
- After selecting the screenshots and clicking on the Submit button, you will get a “bug successfully reported” pop-up on the screen.
Step 4: Verify the Issue in Jira
Log in to your Jira dashboard. The logged issue will be immediately visible.
All details submitted through TestGrid are automatically populated in the Jira ticket. TestGrid also attaches relevant test environment information and associated screenshots to the issue for better traceability and debugging.
