
Image Injection for Camera Testing on Real Devices
Overview:
Image injection is a technique that allows you to test applications that use the device camera by providing them with an image that simulates the camera input. It is used to verify the app’s functionality and behavior based on the injected image. Image injection can help you test your app’s camera features faster, easier, and more reliably.
Step 1: Log in to the TestGrid portal with valid credentials.
- Start by logging in with valid credentials and navigating to the “Real Device Cloud” option tab.
- After selecting the “Connect” button for a specific device, the user will encounter the device screen interface, which showcases a range of options.
- Click the installation button on the device. Tap Image Injection to upload the IPA/APK file. After successfully uploading the IPA/APK file, click the “Upload Image” option for the desired image.
- Click on “Upload Image.” Once the upload image process is complete, you will see a success message; then, click the install button.

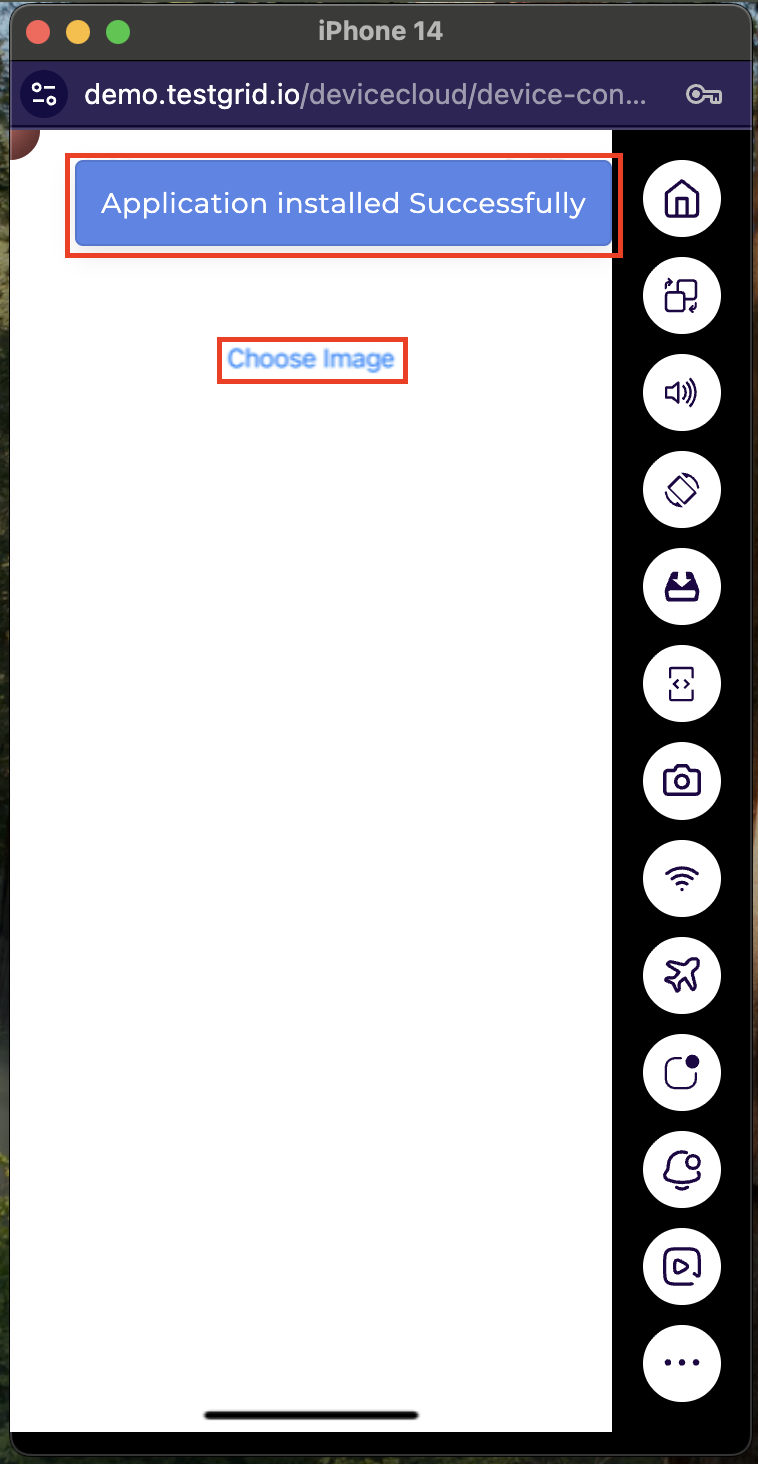
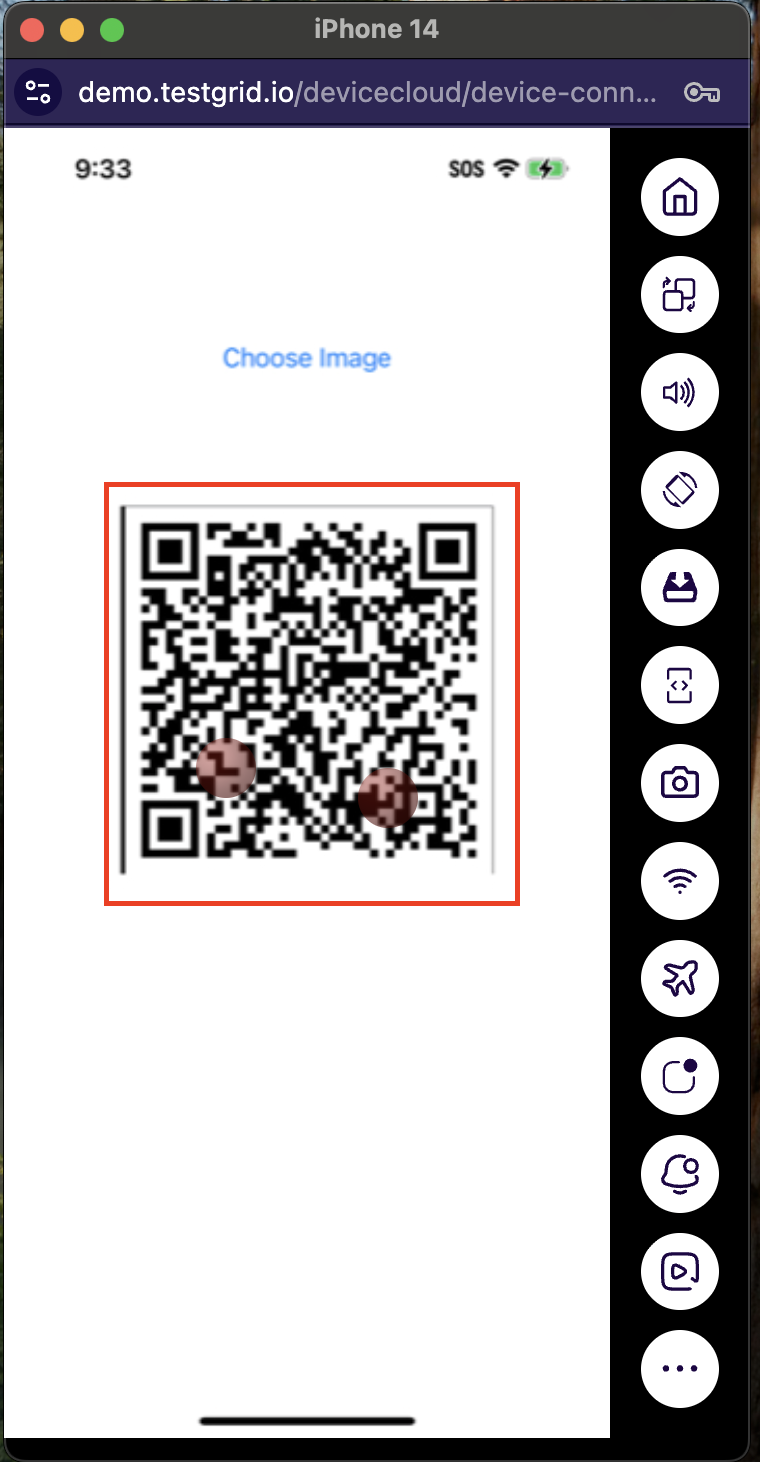
Step 2: Once the installation is complete, you will see the “app installation successfully” message on the top right of the screen; then, click on the “Choose Image” text.
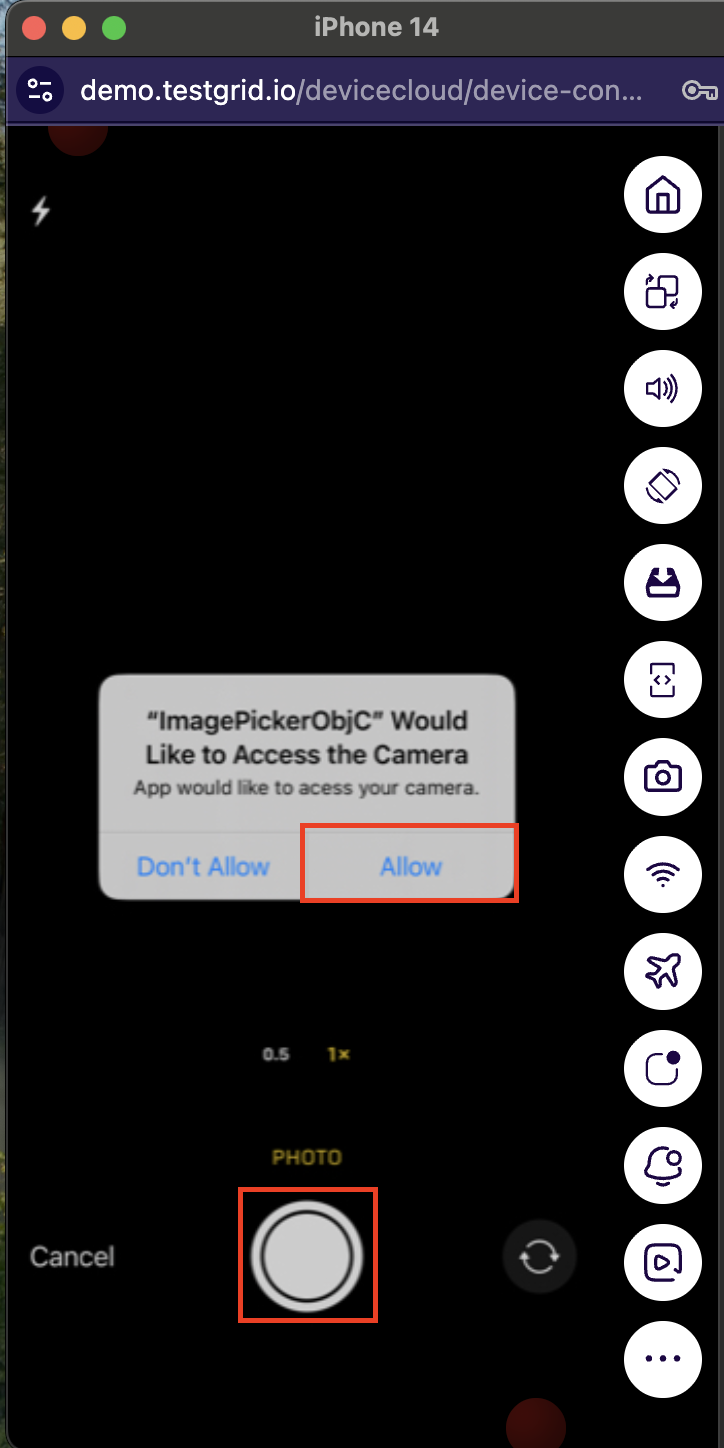
Step 3: After clicking the Choose Image text, the camera screen on the device will open. Click on the OK button to take a picture before pressing the camera button.
Step 4: After taking a picture, you will see the image and on the bottom side, you will see the photo text Click on this.
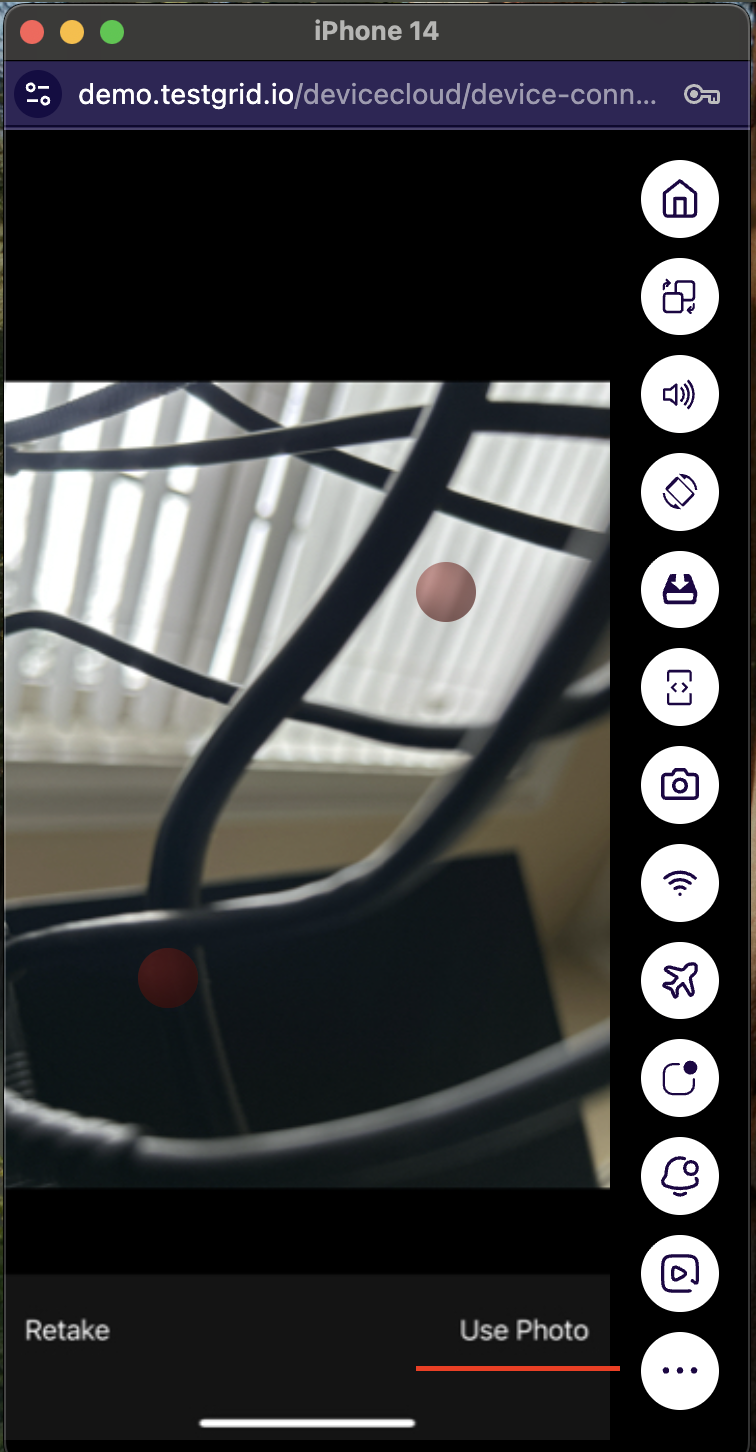
Step 5: Select “Use photo” from the screen to view the uploaded image rather than taking a new one.
Step 6: How to Automate Camera Image Injection with Automation.
You can use TestGrid to test image capture and QR/barcode reading from the camera on a TestGrid mobile device. If your mobile app includes features like check scanning, profile image capture, and QR/barcode scanning, you can use this feature to automate testing of those features.
Camera Testing with TestGrid
This guide explains how to use TestGrid to test camera functionality in mobile apps, including image injection and automated testing via Appium.
1. How TestGrid Enables Camera Testing
TestGrid uses sensor instrumentation to enable apps to communicate with various mobile sensors, such as:
- Camera
- Biometric authentication
When Camera Image Injection is enabled, TestGrid injects a special camera module into the app. This module simulates or overrides the iOS or Android SDK Camera APIs used by the application, allowing automated tests to inject images as if they were captured by the device camera.
2. Test Camera Image Capture During Local Appium Execution
For example, in banking apps, users often capture images of checks for deposits. To test this scenario:
- Upload the desired image to TestGrid.
- Enable Appium for automation.
- Inject the image just before the script clicks the camera button in the app.
This allows your test to simulate a real camera capture without requiring physical input.
2.1. Supported Devices and Camera APIs
Camera image injection works with specific APIs. Check with your app development team to confirm which APIs your app uses.
| OS | OS Version | Supported APIs |
|---|---|---|
| iOS | iOS 13 and above | – finishPickingMediaWithInfo API of UIImagePickerController class– AVCapturePhoto class for receiving captured photos from AVCapturePhotoOutput– jpegStillImageNSDataRepresentation of AVCaptureStillImageOutput |
Note: Image injection is only supported on Android 13+ for Android devices.
2.2. Upload the Desired Image to TestGrid
Use the following cURL command to upload an image to TestGrid. Supported formats: JPG, JPEG, PNG. Maximum size: 1 MB.
Sample Response:
-
The returned media ID will be used in the test script for camera injection.
2.3. Enable Camera Image Injection in the Appium Session
Set the desired capability to enable camera image injection:
This ensures your app goes through sensor instrumentation and interacts with the virtual camera module.
2.4. Inject the Uploaded Image Before the Camera is Triggered
Use a JavaScript Executor in Appium to inject the uploaded image:
-
Replace
"ImageId"with the media ID returned from the upload step.
2.5. Trigger the Camera and Take a Photo
-
Add logic in your test script to click the camera button in the app.
The camera will capture the injected image instead of opening the physical camera.
Note: For Android devices, image injection features are only supported on Android 13 or higher.