
Running Playwright Tests Remotely Using TestGrid
Overview:
This guide provides a quick and easy way to set up and execute Playwright tests on remote browsers using TestGrid’s cloud infrastructure. With minimal configuration, you can run your tests directly from your local system, monitor execution in real time, and access detailed logs, insights, and video recordings. This enables faster debugging, improved visibility, and a seamless testing experience without the need for maintaining local test environments.
Prerequisites:
To run Playwright using TestGrid capabilities, ensure that the following prerequisites are installed on your local machine.
-
Node.js installed (v14 or higher) – Verify installation by running:
node -v
npm -v
-
Playwright is installed. If not already installed, use the following commands from your local machine:
npm install -D @playwright/test
npx playwright install
- Must required capability for TestGrid access
- Valid User Token
- Correct SELENIUM_REMOTE_URL
- Your unique Device ID (UDID)
Step 1: Navigate to the Playwright Section in the TestGrid Dashboard
- Log in to your TestGrid account.
- From the left-hand menu, click on Playwright.
- This section provides device options, setup instructions, and the remote execution command.

Step 2: If you already have your local Playwright project, you can use it directly. Otherwise, you can download and use our sample project.
You can download a sample project provided on the TestGrid dashboard. After downloading, open your terminal and navigate to the project directory:
cd ~/Downloads/sample_playwright_project
Ensure that your project directory contains a valid playwright.config.ts or playwright.config.js file.
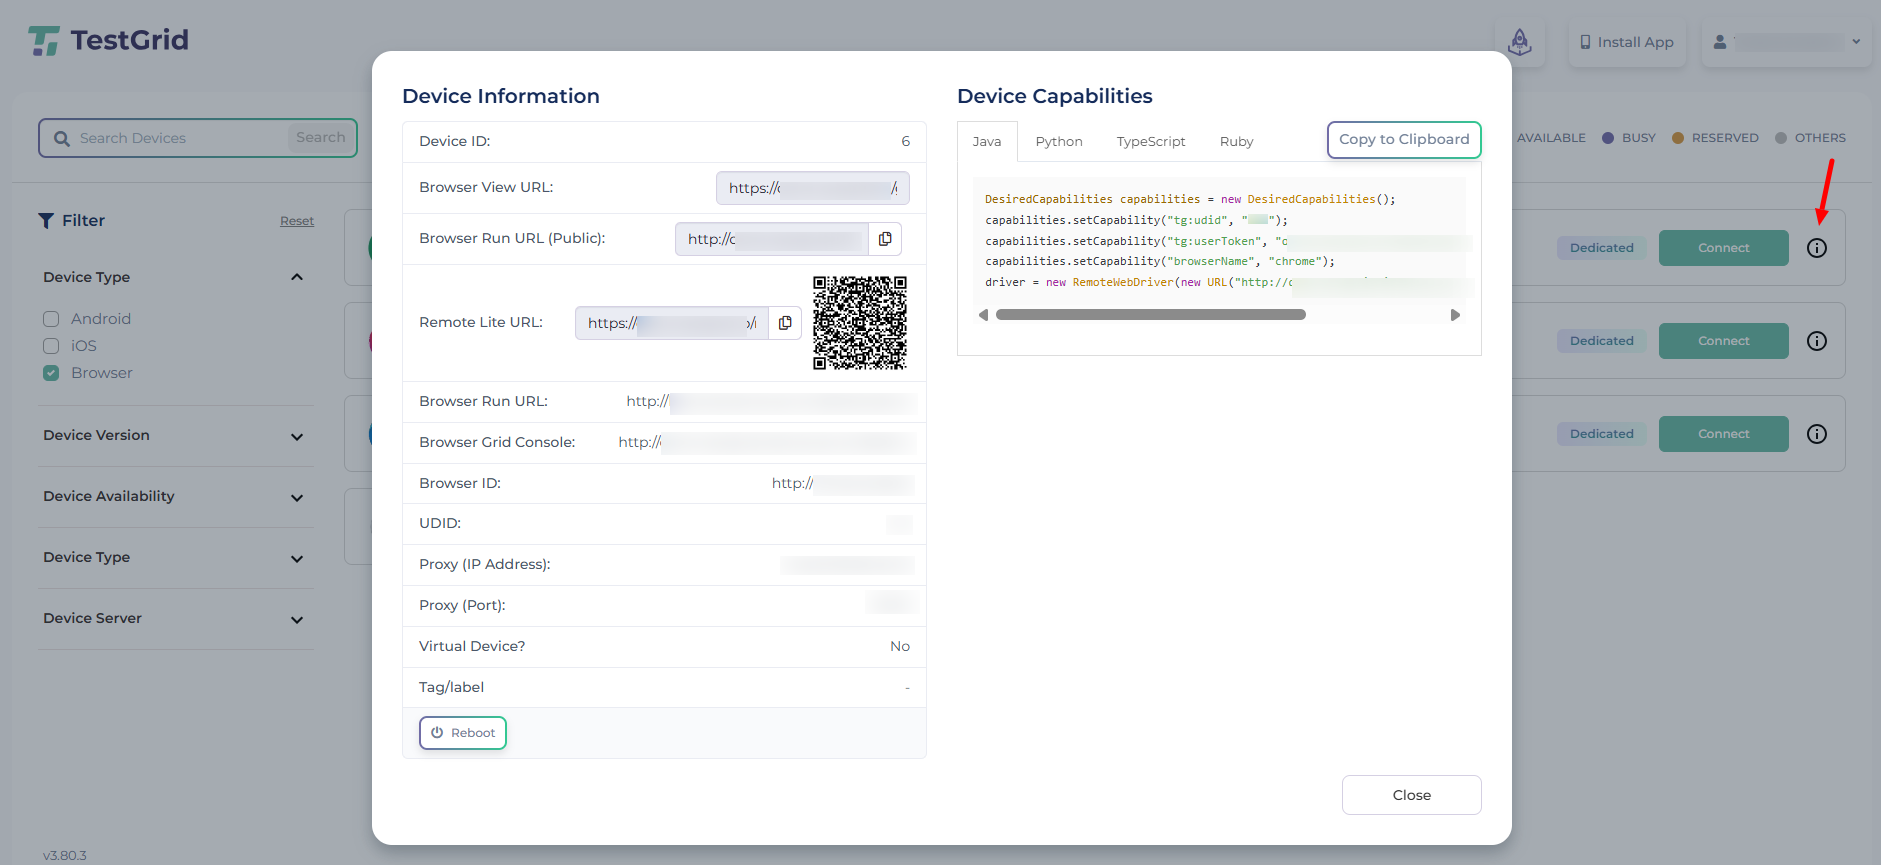
To use TestGrid’s remote browser capabilities, navigate to the Real Device Cloud page. Click the “i” (info icon) next to the desired browser to open the browser details panel. From there, copy the required capabilities.
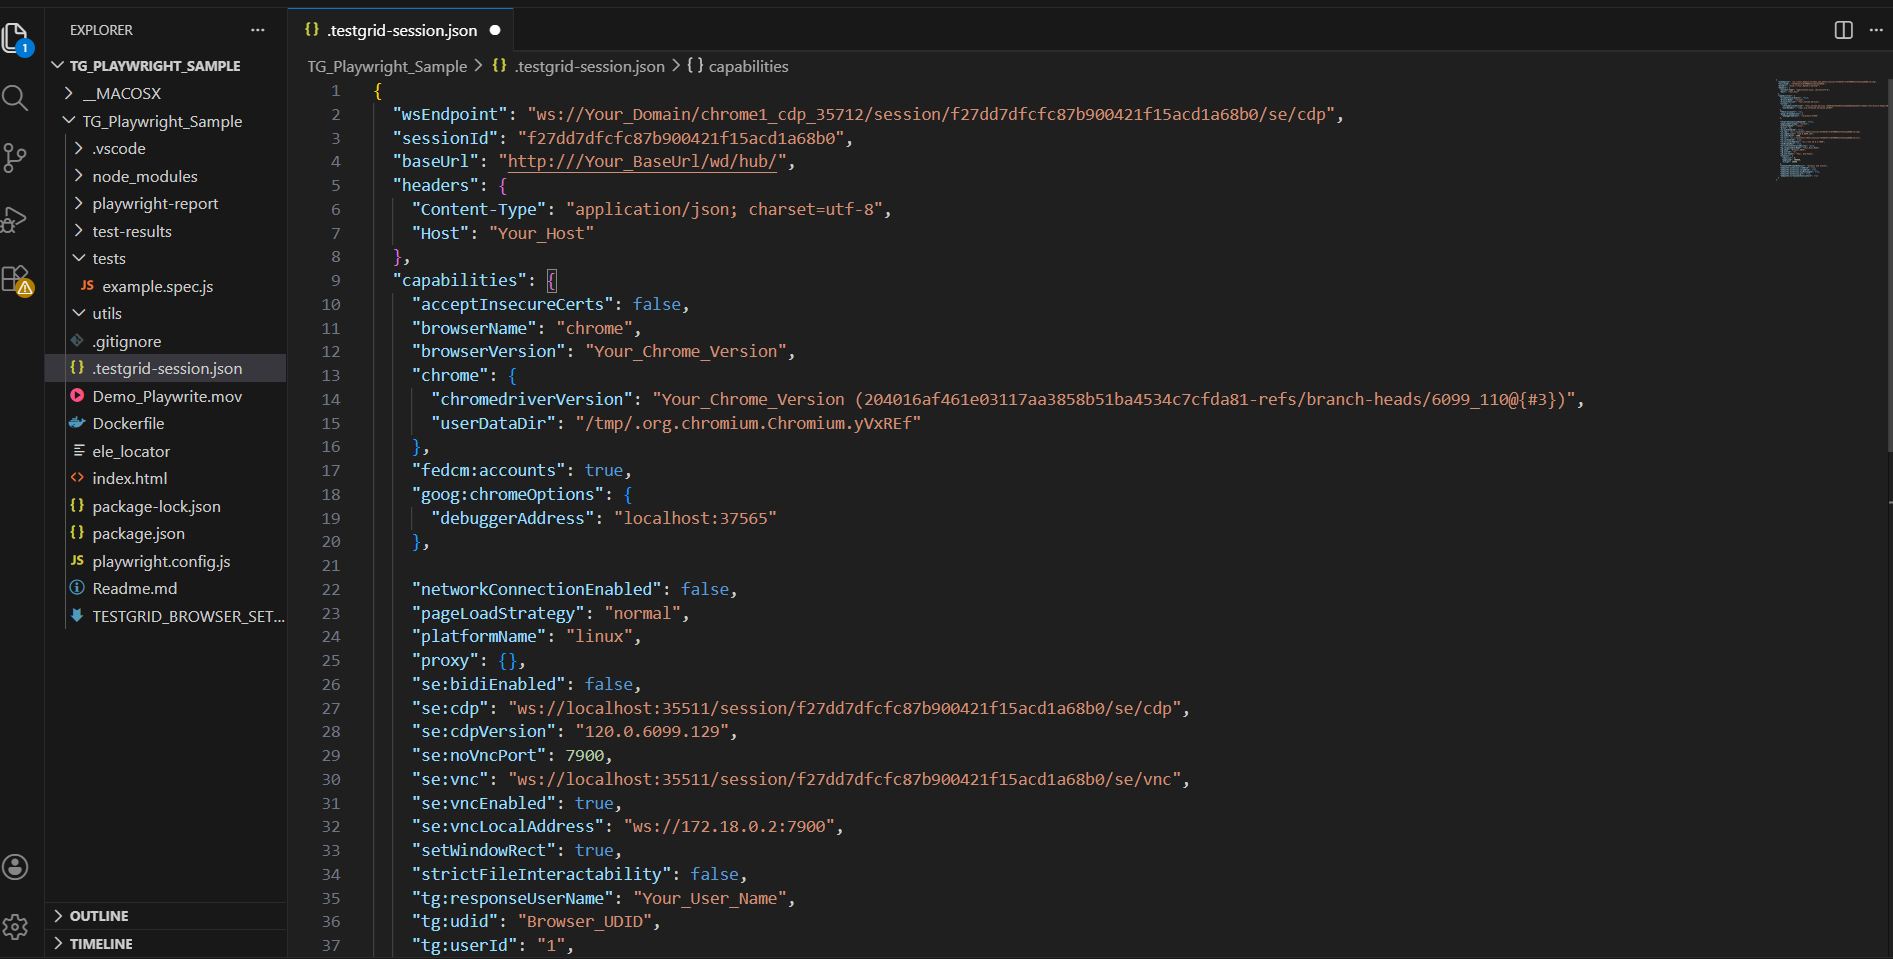
Add these capabilities to your project configuration; this can be in a JSON file, .env file, or YAML file, depending on your project structure.
Make sure to replace all required parameter values with your actual TestGrid details. In particular, update the following:
-
{your_domain}(Browser Run Remote URL) -
{port} -
{user_token}
These values are mandatory and must be correctly configured in your code to successfully start the session and ensure smooth test execution.
Step 3: Execute the Remote Test Command
To run your tests on a remote browser, copy the execution command from the TestGrid dashboard and run it in your terminal from within your project directory.
Run Command for Execution
Execute your Playwright tests using the following command:
npx playwright test --headed
This will start your test execution in headed mode and run it on the configured TestGrid remote browser.
For example, see the screenshots below.
Note on Browser Support
Currently, Playwright test execution on TestGrid is supported only on the Chrome (Chromium) browser. Other browsers such as Firefox and Safari (WebKit) are not supported at this time. Support for additional browsers may be added in future updates.
Step 4: View Execution Results
After your test execution is complete, you can view the results on the TestGrid dashboard.
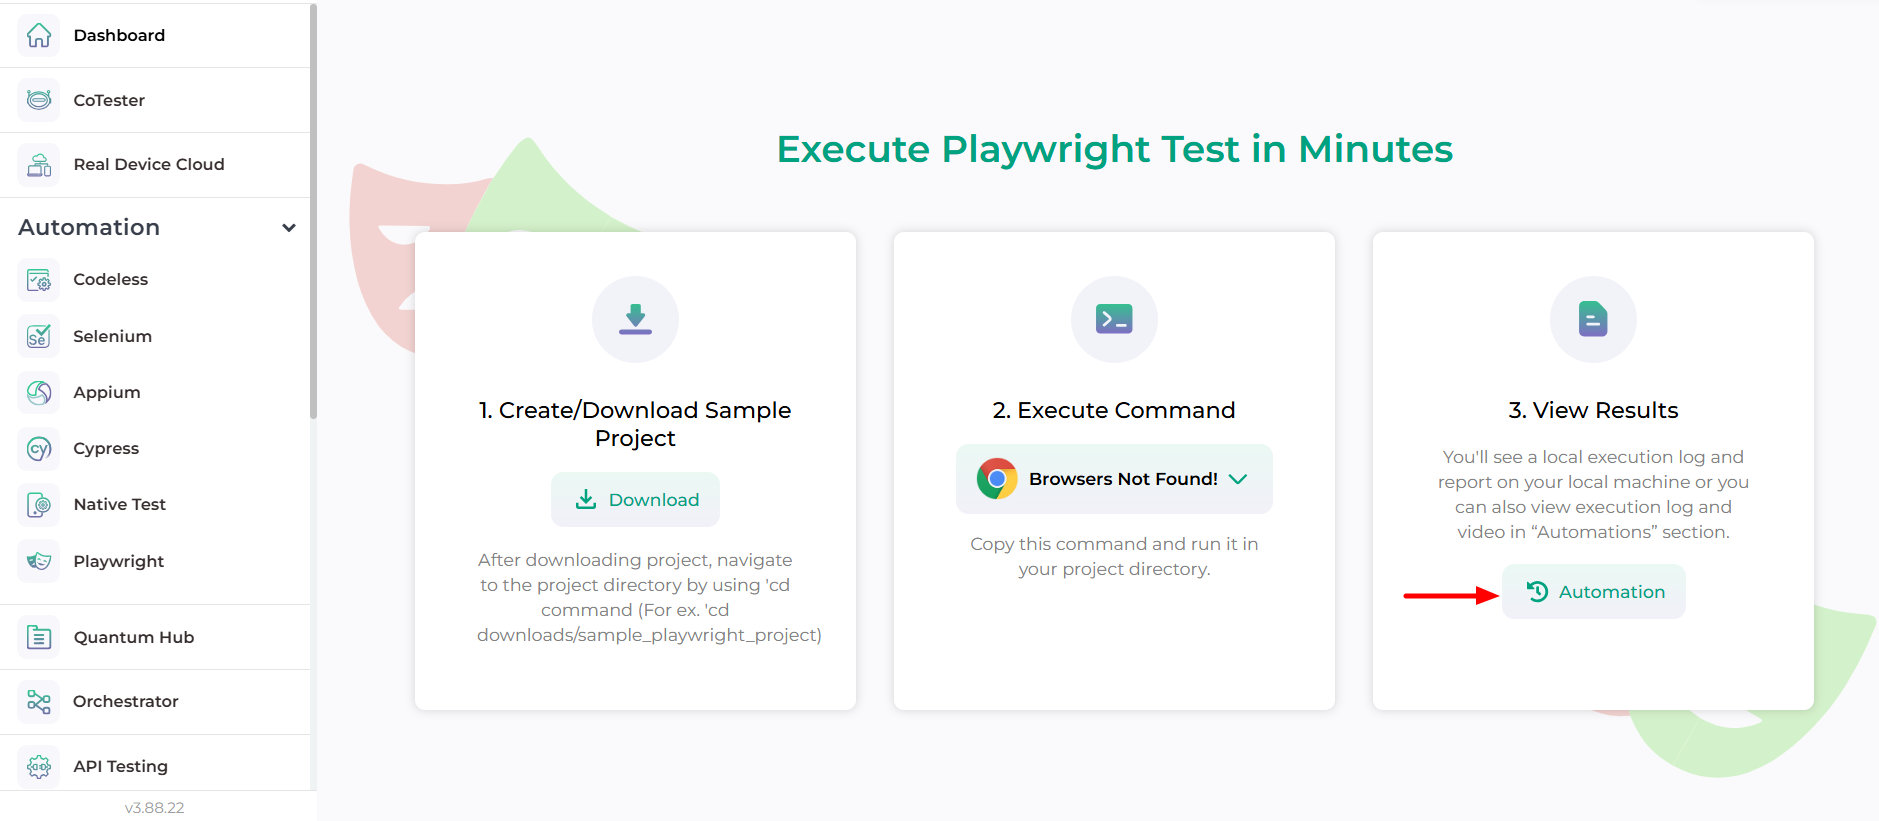
Option 1:
- Navigate to the TestGrid dashboard and click on the Playwright section
- You will be redirected to the Playwright setup page
- Go to the 3rd section (View Results) to check your execution details
Option 2:
- Navigate to the TestGrid dashboard and go to the Automation section
- Use filters such as By Project or By Device to refine the results
- Select the desired browser/device to view the list of all test runs/builds
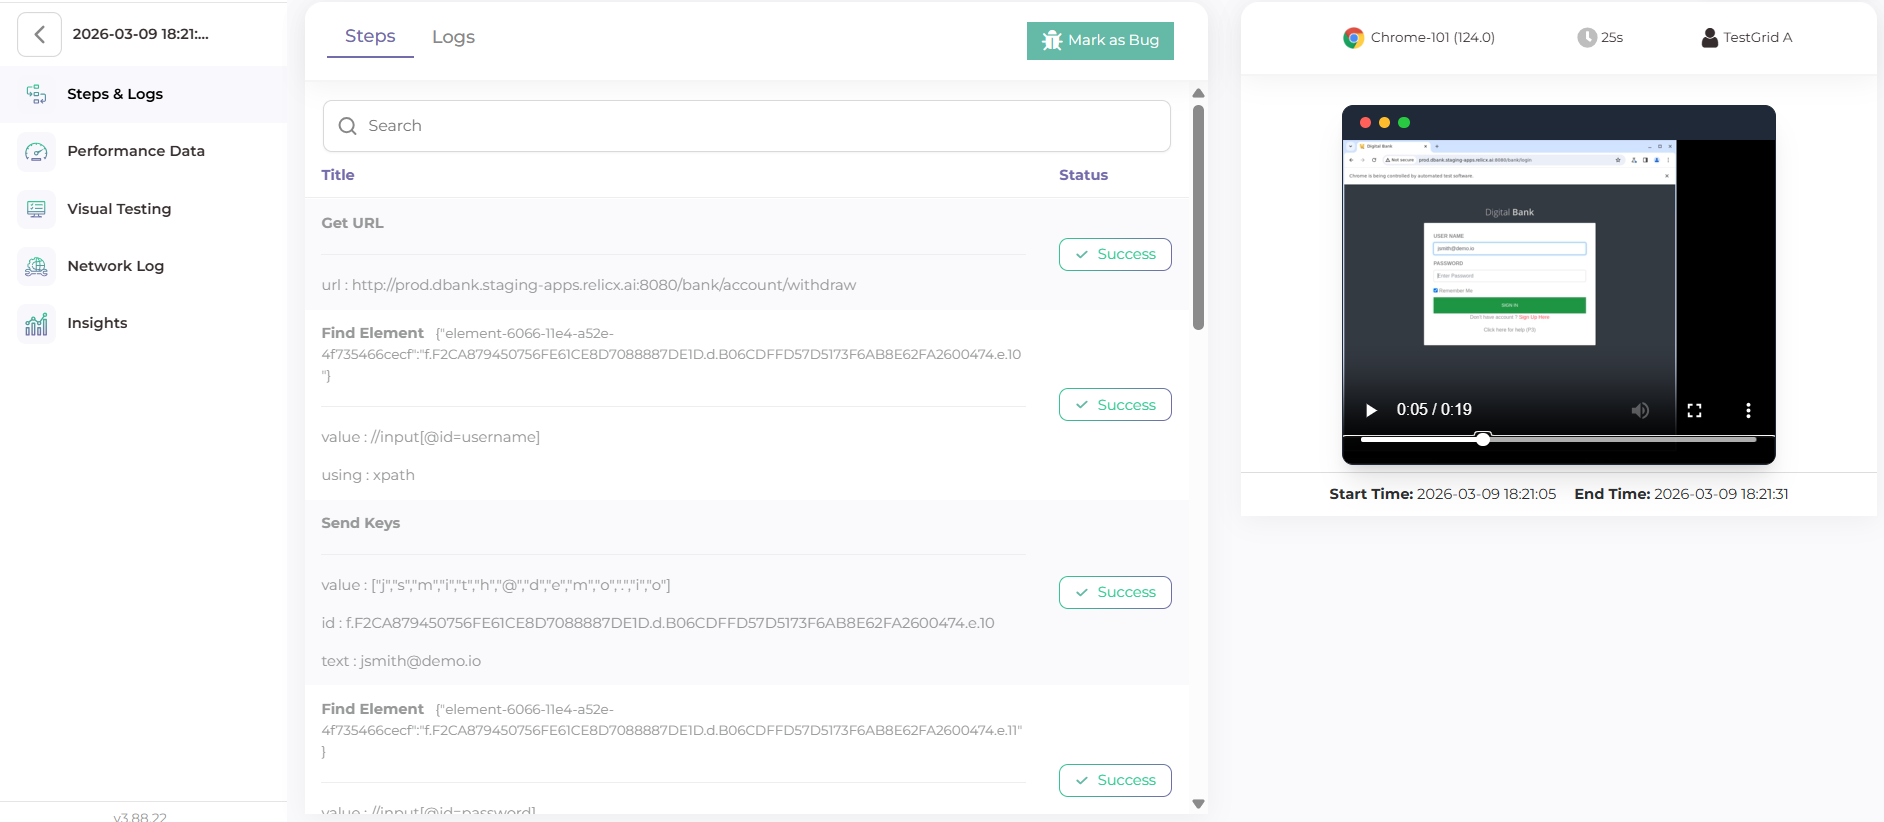
From there, you can open any run to view detailed execution results, logs, and insights.
Here, you can see. Browsers where your tests were executed.
- Step-by-step test execution details.
- Logs and debugging information
- Screenshots and videos.
This helps you easily analyze and debug your test runs.
Refer to the video below for reference.