
Testing your Local Code Execution for Web.
Overview
The open-source Selenium toolkit is primarily used to automate web browsers.
Chrome, Firefox, Safari, Edge, and Opera are just a few of the web browsers that Selenium supports. This makes it possible for testers to conduct cross-browser testing to guarantee uniform behavior across various browsers.
For quicker results, you can quickly set up and test your web browser’s local code using Selenium with TestGrid.
Prerequisites
TestGrid login credentials
Java Development Kit (JDK): Install the latest version of JDK on your machine. Appium is compatible with JDK 8 or later versions.
Integrated Development Environment (IDE): Choose an IDE to write and execute your Java Appium code. Popular choices include IntelliJ IDEA, Eclipse, or NetBeans. Make sure your IDE is properly installed and configured.
Appium Java Client: Add the Appium Java Client dependency to your Java project. Using a build automation tool like Maven or Gradle, you can include the dependency. The Appium Java Client allows you to interact with the Appium server using Java code.
There are client libraries in Java that support Appium’s WebDriver protocol extensions. You should use these client libraries instead of your regular WebDriver client when using Appium.
Start configuring your local Java or other language code right away.
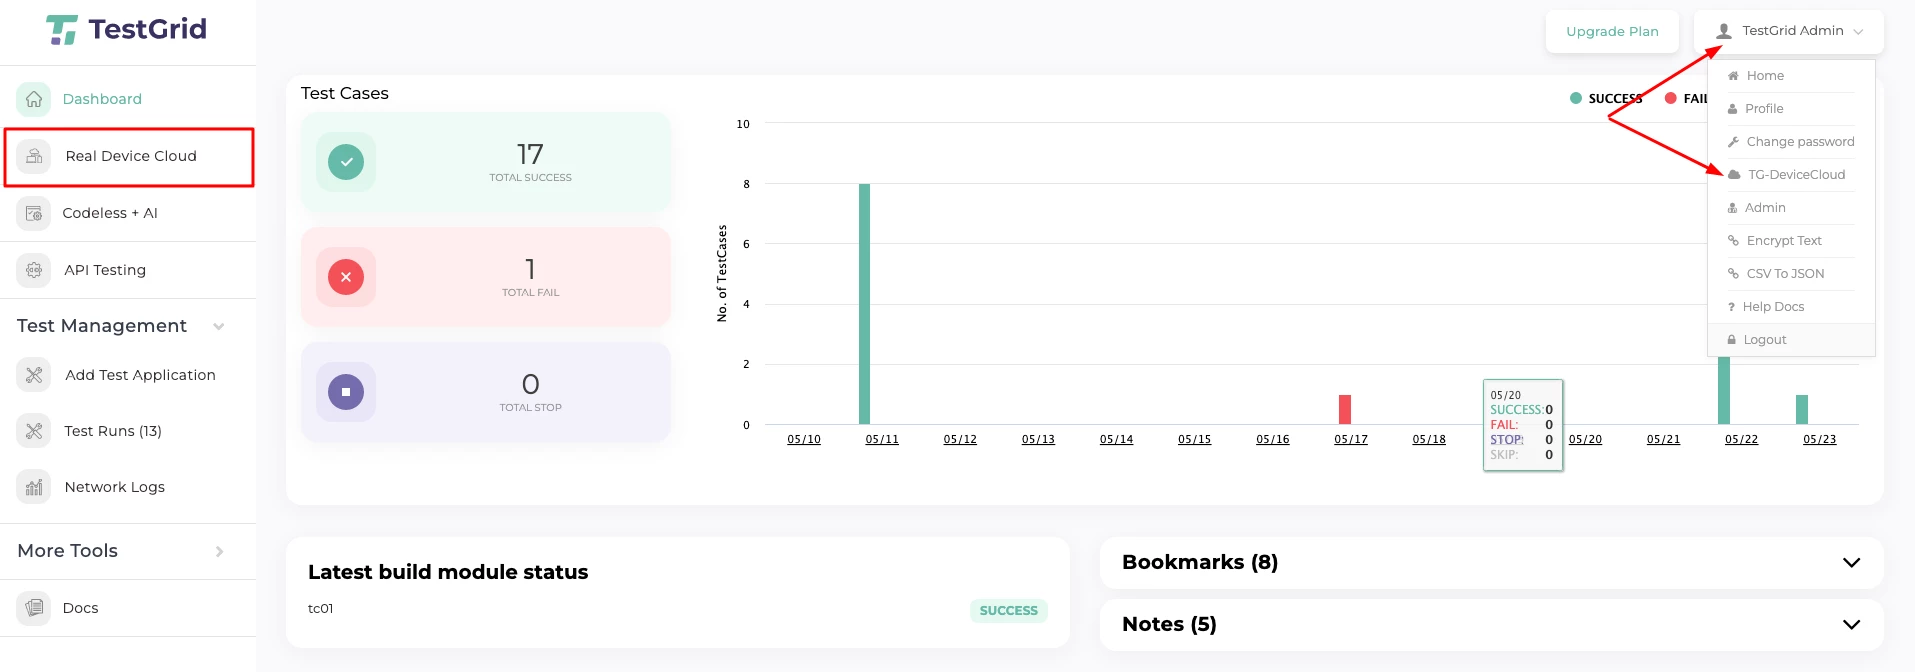
Step 1: Open the Device Cloud tab and locate the appropriate browser’s information for running.
Login with TestGrid credentials and go to the Devices Cloud option tab.
Once the device cloud screen appears, you can find a number of devices and browsers there.
Step 2: Now, Choose the browser in which you want to run your local Selenium code.
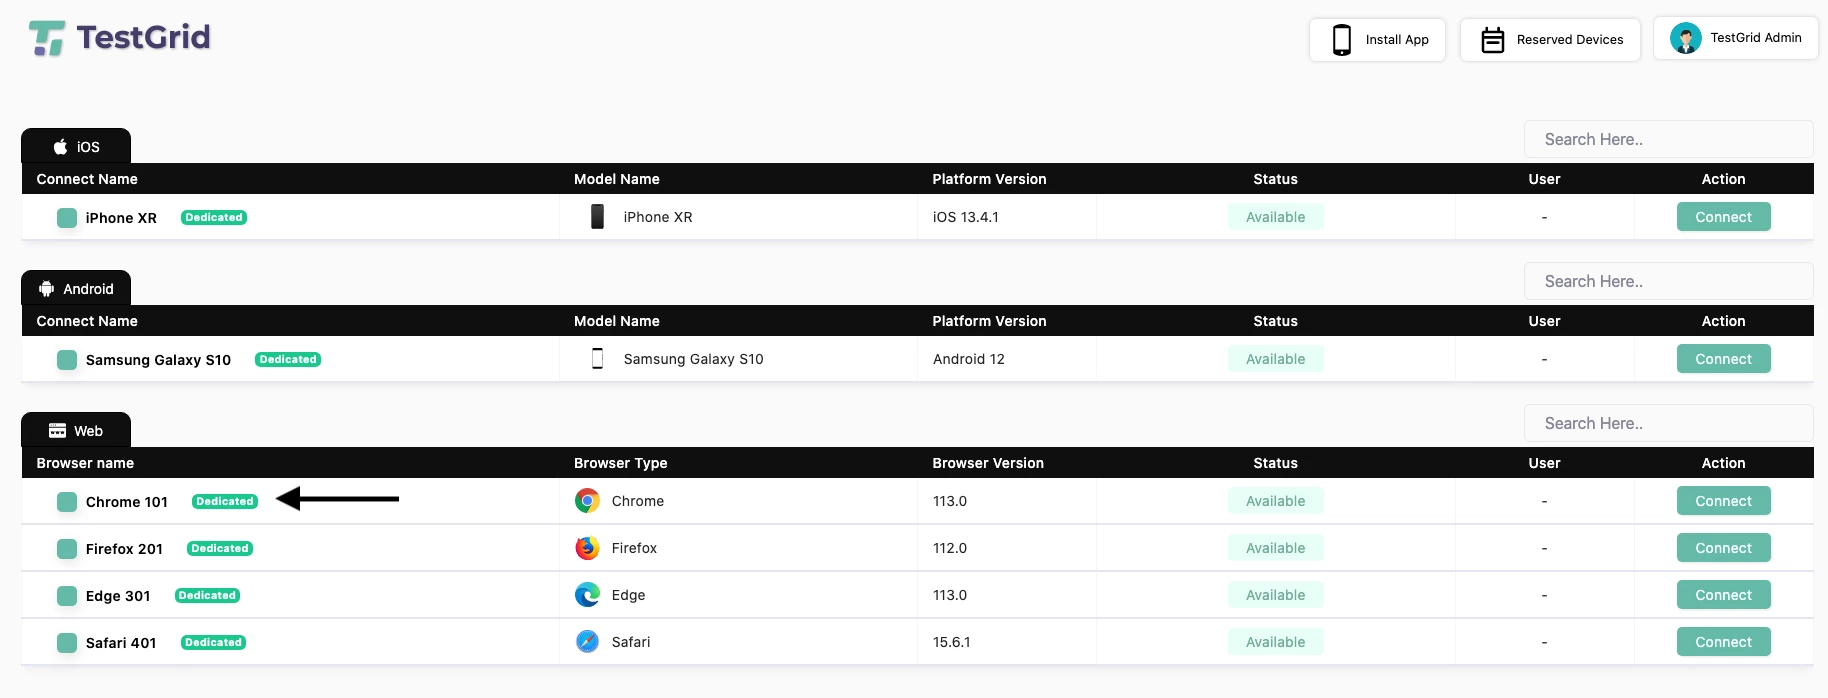
Step 3: Select the browser and update the “Browser Run URL (Public)” and “Browser Type” provided in your local Selenium code.
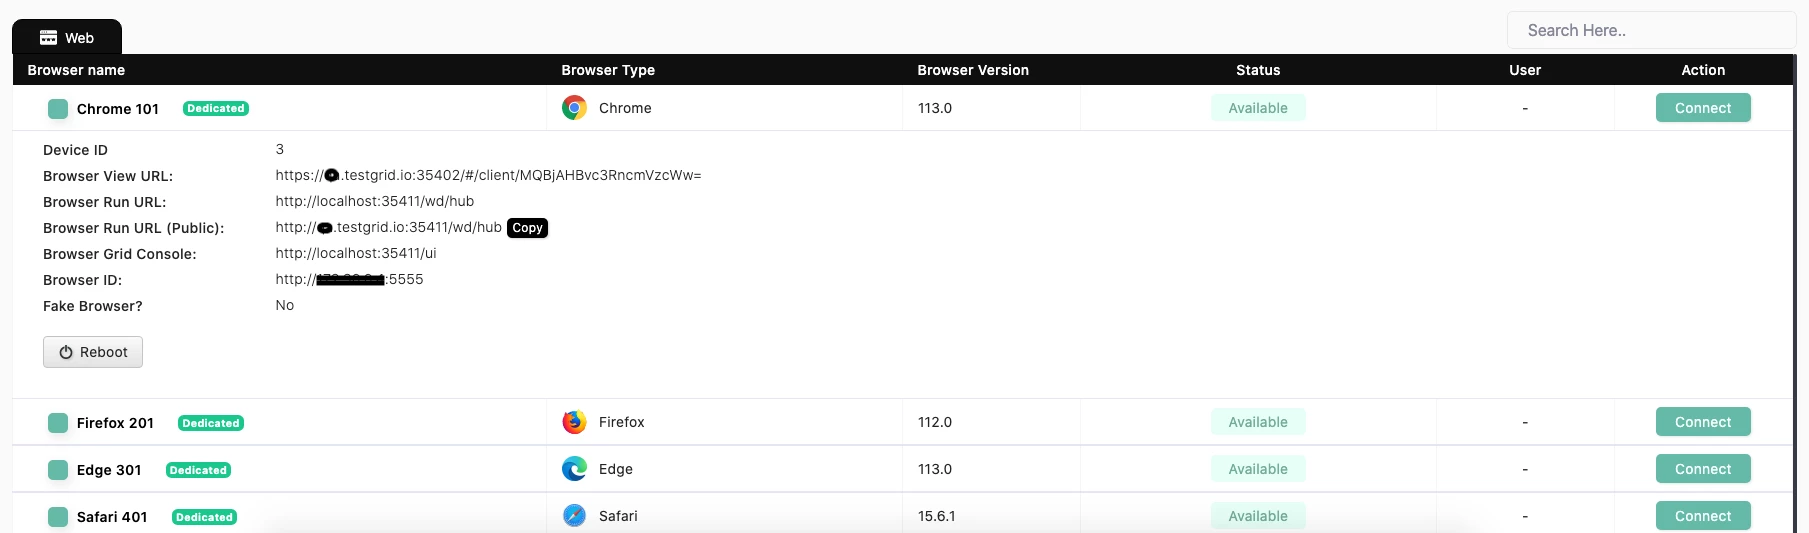
For example
       {
         "browserName": "Chrome",
         "platformName": "Linux",
         "userToken: "4dro2mqijmffubwp9qtnx6555562nuiuzmynjh",
         "browserUrl": "http://{Your_Domain}.testgrid.io:351411/wd/hub",
         "udid": "101",
         }
Step 4: Steps to execute local Selenium code
- TG_BROWSER_URL
- setBrowserName capability to one of the following:
- BrowserType.CHROME
- BrowserType.FIREFOX
- BrowserType.EDGE
- BrowserType.SAFARI
- TG_UDID
- TG_USER_TOKEN
Note: In the TestGrid Local Execution flow, the driver.quit(); method must be called at the end of each test case.
- This ensures the active session is properly closed.
- All test results will be correctly reflected, including:
- Test Case Name
- Test Case Steps
- Visual Testing Result
- Server-Side Logs
- Execution Recording Video
- Insights Data
- Transaction Analysis
If it driver.quit(); is not called, the session may instead show only a timestamp (date and time). Additionally, any intermediate failures will be highlighted as errors in the logs.
// 1.Set the capabilities of the driver
// ChromeOptions chromeOptions = new ChromeOptions();
DesiredCapabilities chromeOptions = new DesiredCapabilities();
chromeOptions.setCapability("browserName", "firefox");
// chromeOptions.setCapability("browserVersion", "114");
chromeOptions.setCapability("platformName", "linux");

chromeOptions.setCapability("tg:userToken", "< Your_User_token_here >");
// ----- OR ----- //
chromeOptions.setCapability("tg:userName", "< Your_Emails_ID >");
chromeOptions.setCapability("tg:password", "< Your_Password >");
chromeOptions.setCapability("tg:udid", "201");
WebDriver driver = new RemoteWebDriver(new URL("http://{_YOUR_Domain_}.testgrid.io:34555/wd/hub"), chromeOptions);
Step 5: Determine the user’s Token capabilities.
a. After starting the test case writer, click versions. On the same screen, look for the “i” button in the upper right corner.
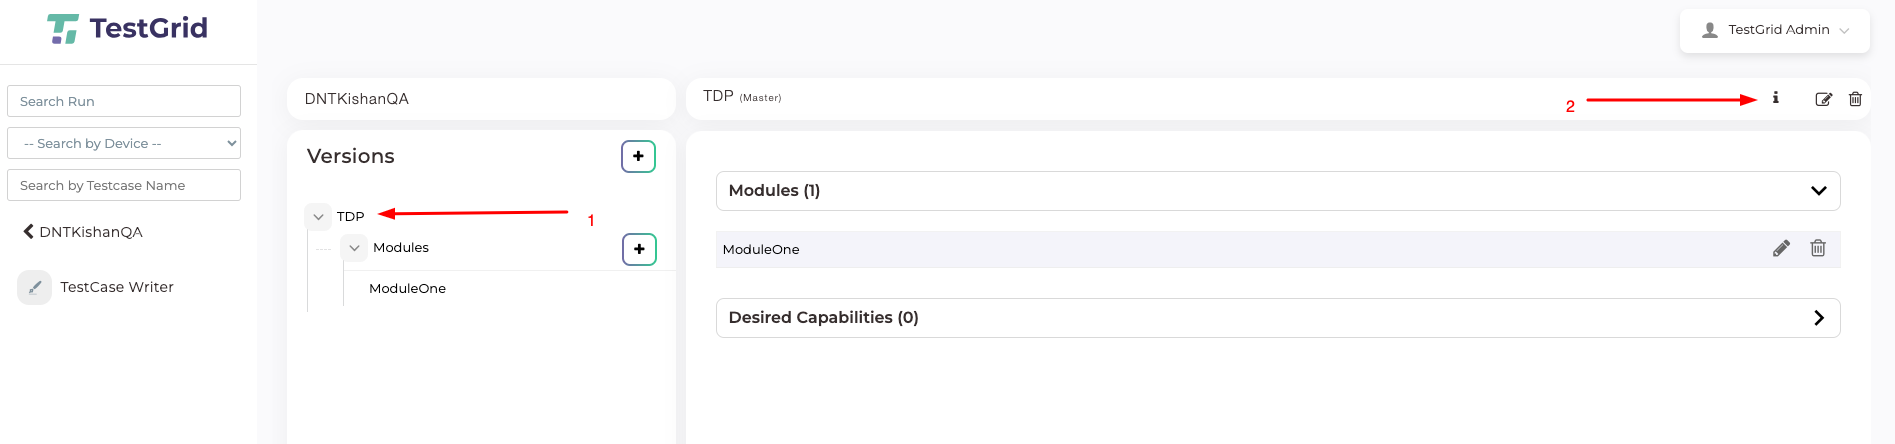
b. Select the “i” button icon, and from there, obtain the user token.

Step 6: Execute your local Selenium code. Below is the sample for Java.
For example, Selenium using JAVA.
import org.openqa.selenium.By;
import org.openqa.selenium.WebDriver;
import org.openqa.selenium.chrome.ChromeOptions;
import org.openqa.selenium.remote.DesiredCapabilities;
import org.openqa.selenium.remote.RemoteWebDriver;
import java.net.MalformedURLException;
import java.net.URL;

public class ChromeGridTest {
public static void main(String[] args) {
String url = "https://demoqa.com/";
try {
// ChromeOptions chromeOptions = new ChromeOptions();
DesiredCapabilities chromeOptions = new DesiredCapabilities();
chromeOptions.setCapability("browserName", "firefox");
chromeOptions.setCapability("platformName", "linux");
chromeOptions.setCapability("tg:userToken", "Your_User_token_here");
chromeOptions.setCapability("tg:userName", "< Your_Emails_ID >");
chromeOptions.setCapability("tg:password", "< Your_Password >");
chromeOptions.setCapability("tg:udid", "201");
WebDriver driver = new RemoteWebDriver(new URL("http://{_YOUR_Domain_}.testgrid.io:34555/wd/hub"), chromeOptions);
Thread.sleep(15000);
driver.get(url);
System.out.println("Redirected to "+url+" successfully. ");
Thread.sleep(15000); // Replace driver. Wait with Thread.sleep for the desired delay
driver. Quit();
} catch (MalformedURLException e) {
e.printStackTrace();
} catch (Interrupted Exception e) {
e.printStackTrace();
}
}
}
Step 7: View live results on the TestGrid Device cloud.
Additionally, the remote execution of code can also be viewed live on the TestGrid Device Cloud.
As simple as that! Happy Testing!