
Scriptless Test Case Creation in TestGrid
The test case is a set of conditions that determines if the application or one of its modules is behaving as expected. You can write multiple test cases in a single module. Test cases are executed in alphabetically ascending order of test case names. Here’s a step-by-step guide for Scriptless/Codeless Test Case Creation.
Getting Started with Scriptless/Codeless Automation
Create or Access a Scriptless/Codeless Project:
- Navigate to Automation → Codeless from the top menu.

- Click Create a New Project.
- You can also add and access a Demo Scriptless/Codeless Project using the Import Demo Project option.

Record New Test Case:
- Enter the Project Name and Test Suite Name.
- Select the Platform (iOS / Android / Web) for authoring test cases.
- Click on Next.

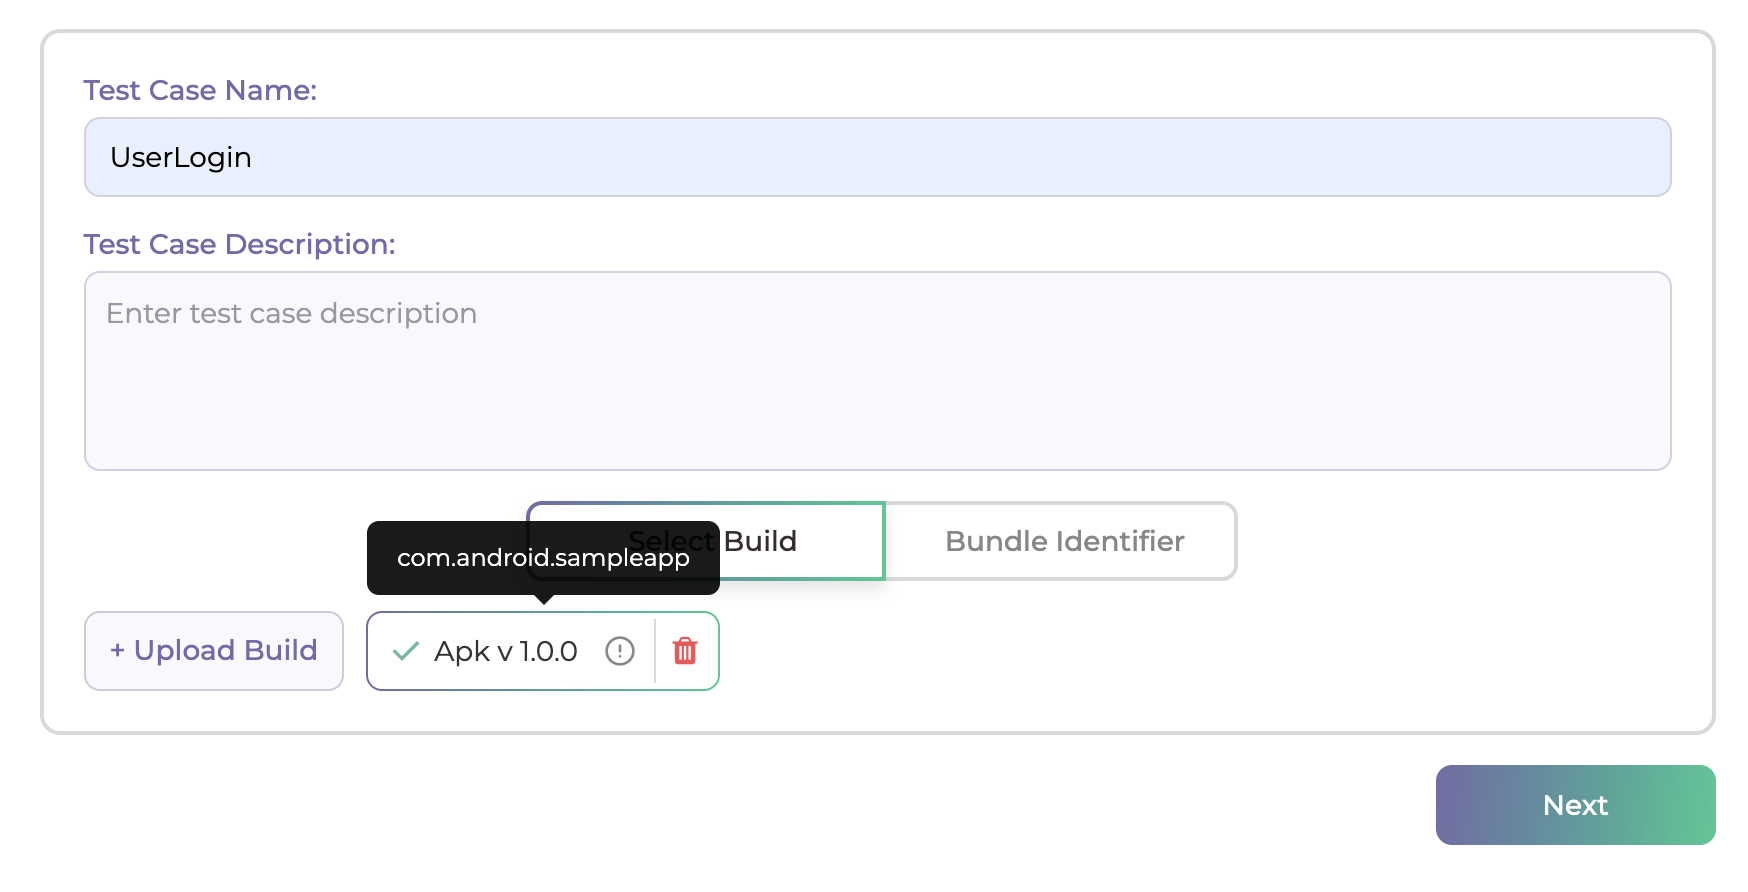
- Provide the Test Case Name.
- Select an uploaded Build or enter the Bundle Identifier to continue.
- Click on Next.

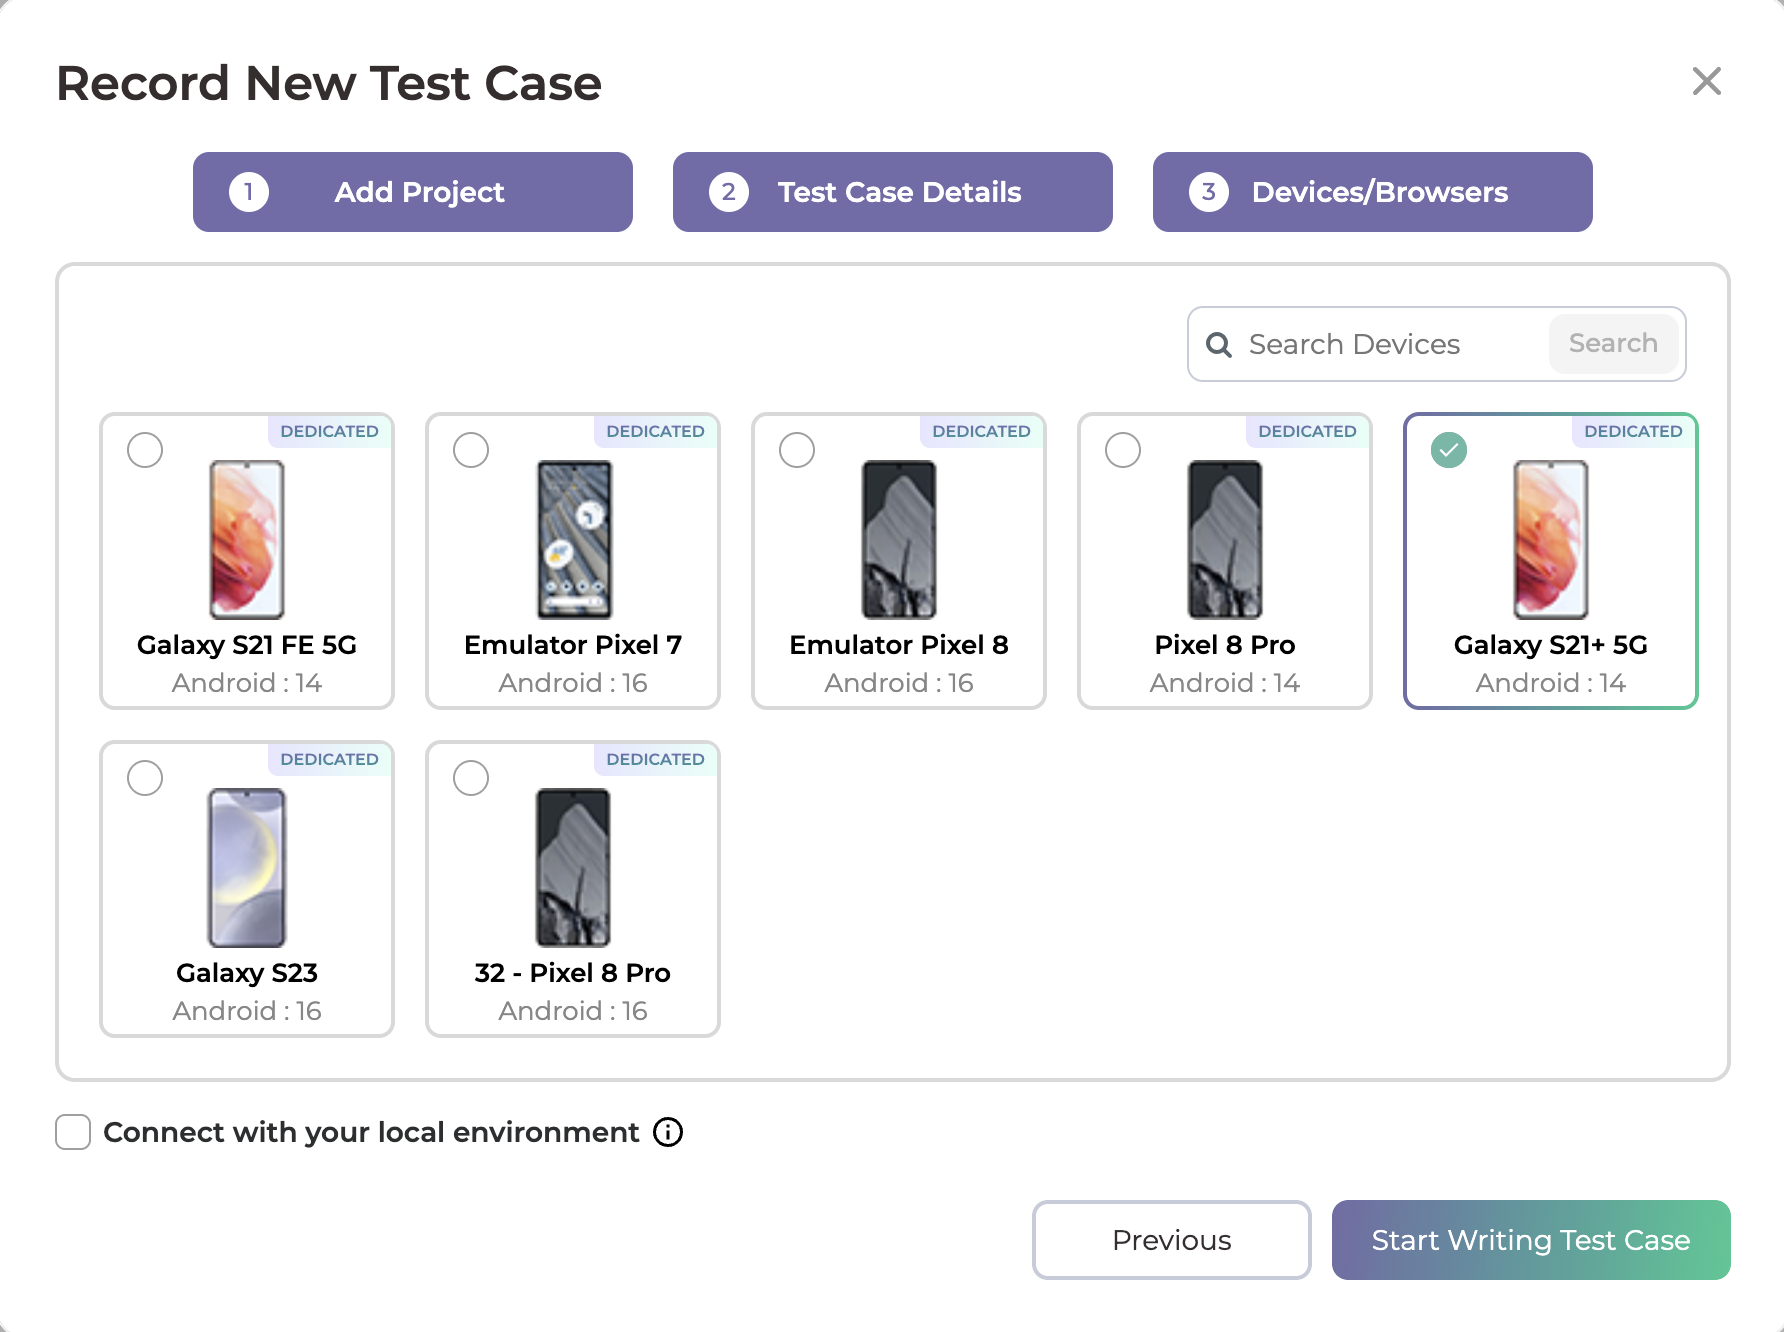
- Choose the Device/Browser on which you want to create the test case.
- Click Start Writing Test Case.
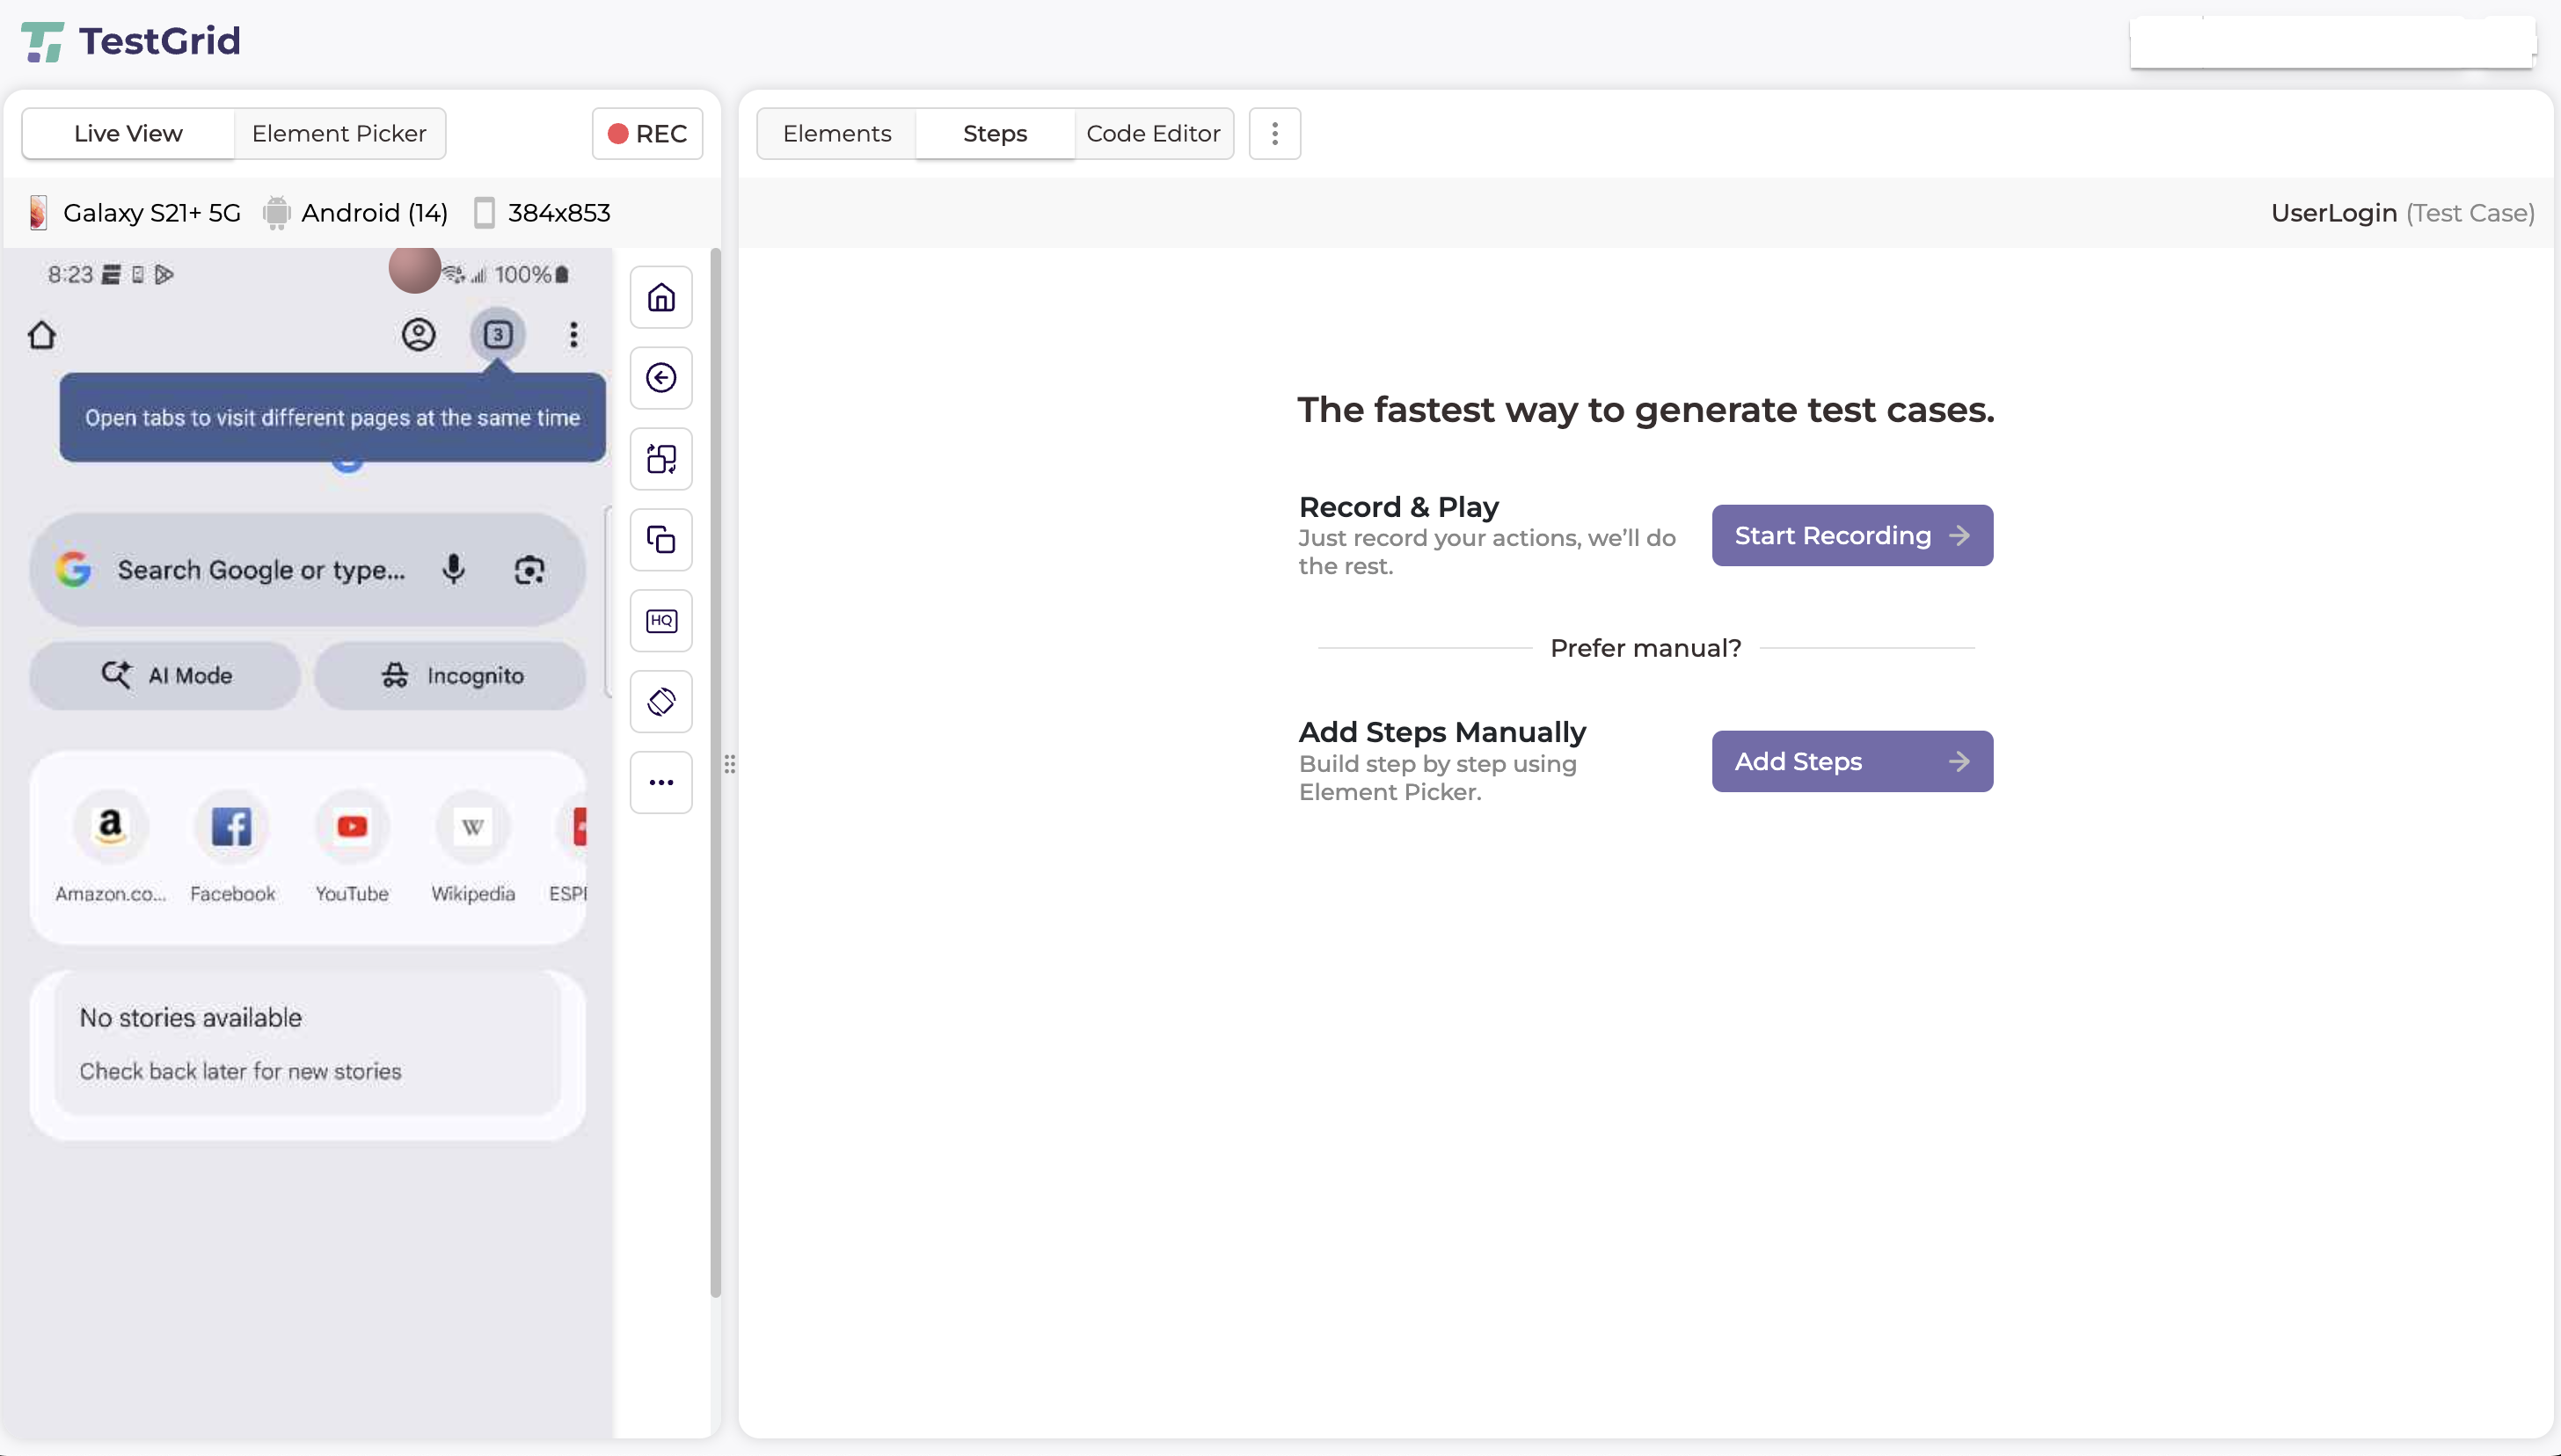
Create Test Steps in Scriptless/Codeless Generator:
- You will be redirected to the Scriptless/Codeless Generator.
- Create test steps using one of the following options:
- Record & Play to capture actions automatically
- Manual Step Creation to add steps explicitly
- Create the test case according to your defined test scenarios.
- After adding the required steps, click the Save button located in the top-right corner, below the User Info section, to save the test case.
Debug Test Case:
- Use the Debug button to:
- Debug an individual test step, or
- Debug the entire test case.
- Debug logs and step execution details are displayed in the bottom-right Execution Panel.
Execute Test Case:
- You can run the test case directly from the Scriptless/Codeless Generator screen.
- To run the test case:
- Open the Debug dropdown located in the top-right corner, next to the Save button.
- Select Run.
- The test case execution will start immediately.
View Execution Details:
- During execution, you can monitor:
- Step-by-step execution
- Execution logs
in the bottom-right Execution Panel.
- Click the Build Link button available on the right side of the Execution Panel.
- This action opens the Build Execution Details in a new browser tab.
View Execution Results and Reports:
- You can Monitor execution in real time while execution is runing
- After the test execution is completed, We provides a detailed execution report with the following information:
-
- Execution Status (Pass/Fail)
- Provides the final execution outcome of the test case.
- This status serves as a verifiable indicator of test completion and result consistency for audit and compliance reporting.
- Step-wise Execution Logs
- Maintains a detailed, immutable log of each executed test step, including:
- Action performed
- Execution status
- Timestamps
- Error details (if applicable)
These logs ensure full traceability and support audit reviews, root-cause analysis, and regulatory validation.
- Maintains a detailed, immutable log of each executed test step, including:
- Screenshots
- Automatically captured screenshots are available for:
- Each executed step (configurable)
- Failure conditions
Screenshots provide visual proof of execution, supporting compliance verification and defect validation.
- Automatically captured screenshots are available for:
- Video Recording (If Enabled)
- End-to-end video recordings of test executions are available when enabled.
- These recordings serve as non-repudiable execution evidence and are especially useful for audits, compliance reviews, and stakeholder verification.
- Network Log Details
- Captures detailed network activity during test execution, including:
- API and service requests
- Response payloads
- HTTP status codes and latency metrics
Network logs enable backend validation, integration traceability, and security analysis in regulated environments.
- Captures detailed network activity during test execution, including:
- Transaction Analysis
- Provides transaction-level visibility, allowing teams to analyze:
- Request and response performance
- Transaction success and failure states
- Latency and bottleneck indicators
This data supports performance governance, service-level validation, and operational compliance.
- Provides transaction-level visibility, allowing teams to analyze:
- Insights and Analytics
- Aggregates execution data to deliver actionable insights, such as:
- Recurring failure patterns
- Performance degradation trends
- Stability and reliability indicators
These insights help organizations maintain continuous quality assurance and risk mitigation strategies.
- Aggregates execution data to deliver actionable insights, such as:
- Execution Status (Pass/Fail)
- All execution artifacts, logs, recordings, and analytics are securely stored and can be accessed from the Build Execution Details page, ensuring data integrity, audit readiness, and compliance alignment across enterprise workflows.
Maintenance and Reusability
TestGrid’s codeless automation framework is designed to simplify long-term test maintenance and promote reuse across teams and projects, while minimizing operational overhead.
- Visual Test Maintenance
- When application UI changes occur, test steps can be updated visually directly within the Scriptless/Codeless Generator, without modifying any underlying scripts.
- This reduces maintenance effort and ensures faster adaptation to UI updates.
- Reusable Shared Actions
- Commonly used test steps and workflows can be saved as Test Functions and reused across multiple test cases.
- This approach:
- Promotes consistency across automation assets
- Reduces duplication of test logic
- Enforces standardized testing practices across teams
- No Script-Level Changes Required
- All updates and enhancements are managed through the no-code interface.
- Since there is no dependency on scripts, teams can maintain test cases without requiring programming expertise, reducing risk and improving maintainability.
This approach ensures scalable test automation, lower maintenance costs, and improved test stability, making it suitable for enterprise environments with frequent application changes.
Upload/Add New Build:
- On the Record New Test Case page, click the Upload Build.
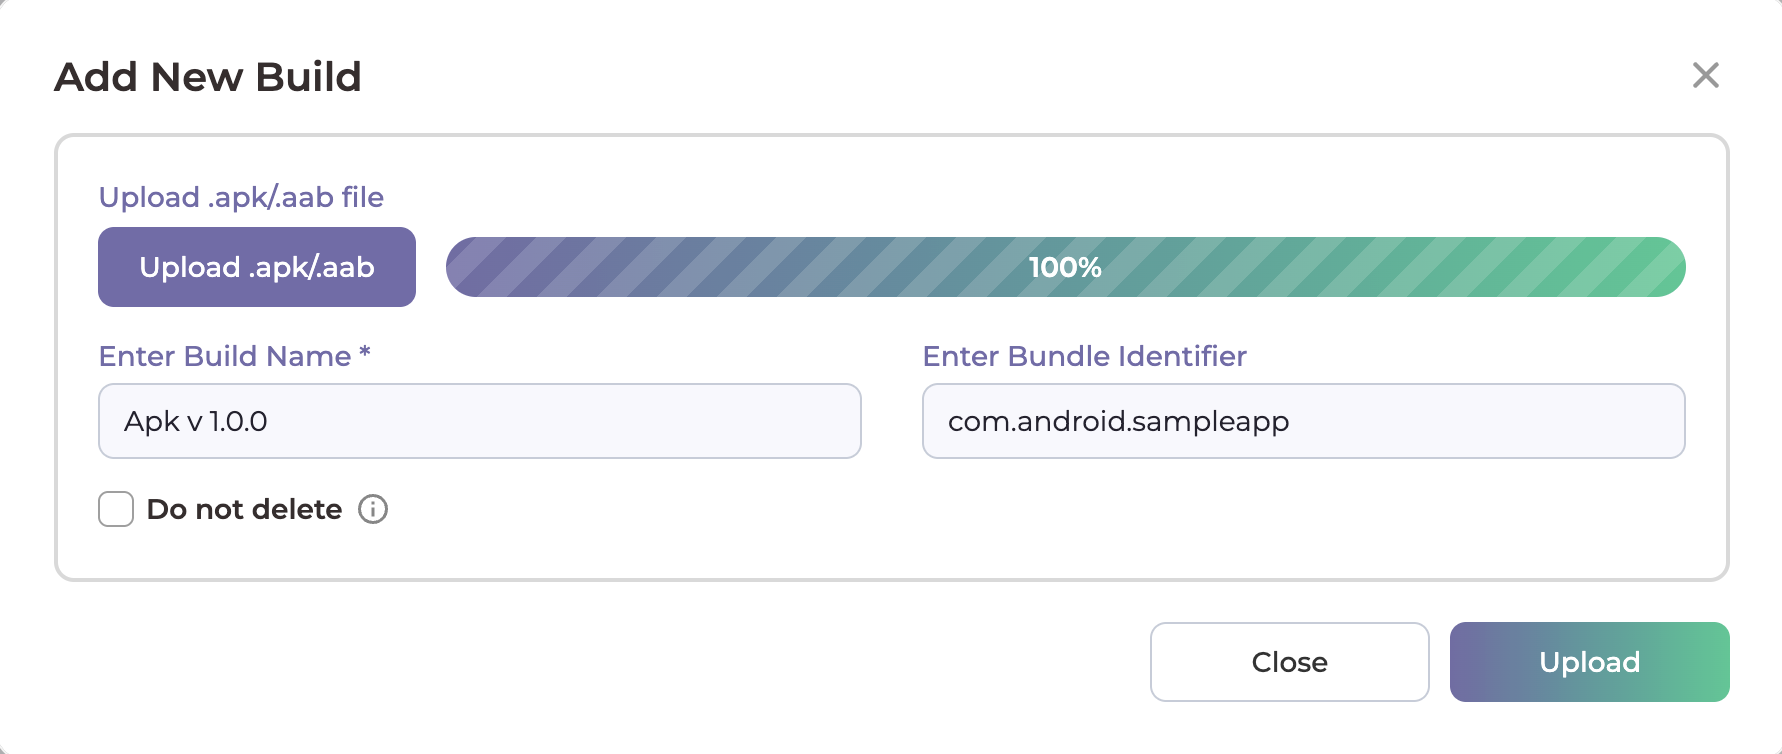
- Upload .apk/.aab file for android and .ipa file for ios and Add Build name.
- Click on Upload.
- You can now view the uploaded build.
Add Version:
- Click on the plus icon beside versions.
- Add Version Name And choose the Platform for writing test cases.
- Click on Save.
Add Test Suite:
There are two ways to add test suites in a version:
- 1. Using the Plus (+) Icon
- Click the plus (+) icon next to Test Suites in the left panel.
- Enter the Version Name for test suite and save.
- 2. Using the Add Test Suite Button
- Open the Version Info page.
- Click the Add Test Suite button.
- Enter the Version Name for test suite and save.
Note : Users can add multiple test versions within a project and associate multiple test suites under the same test version. This helps organize test cases based on application releases, features, or testing cycles.
Example – 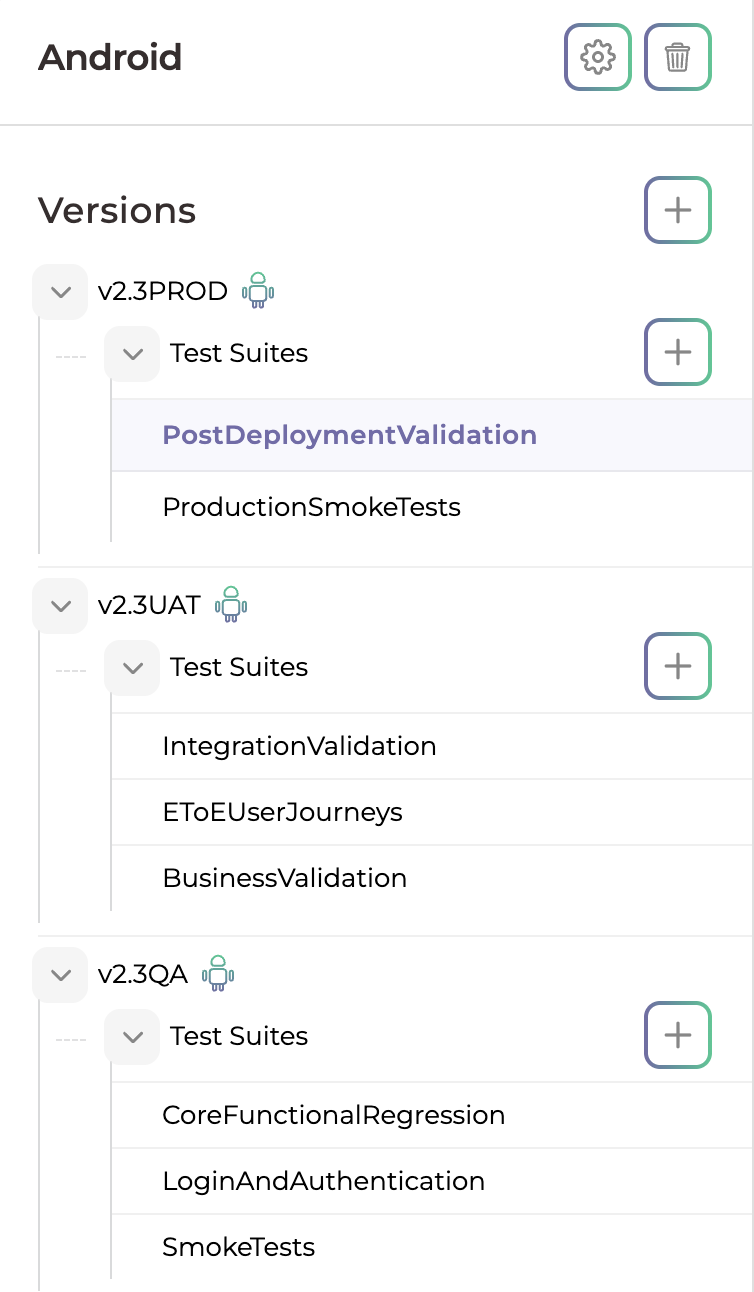
Desired Capabilities :
- Click the “Desired Capabilities” dropdown to expand the configuration panel.
- Select Add Desired Capability.
- A new configuration Pop-up will appear with two input fields:
- Key Name (Capability name)
- Key Value (Corresponding value)
- Enter the appropriate Key Name for the capability you wish to add
- Enter the corresponding Key Value
- Click “Save” to apply the configuration to your Version.
- Users can include features such as Application Configuration (appActivity), Execution Behavior (noReset, fullReset, and Security), and Permissions (autoGrantPermissions and autoAcceptAlerts).
Import Statements :
- Click the “Import Statements” dropdown to expand the configuration panel.
- Select Add Import.
- Enter the required package or class name.
- Click “Add Statement” to apply the configuration to your Version.
- It used when a custom script is added within a test case and external classes, libraries, or reusable components are required. Import statements ensure that all required dependencies are available during test execution.
Happy Testing!