
Automating APIs with Codeless Automation
Overview
TestGrid allows users to extend Codeless Automation by integrating API testing through Custom Script steps. This approach enables teams to validate backend APIs and combine them seamlessly with UI automation flows, without moving away from the codeless framework.
Using custom scripts, users can:
- Trigger REST APIs (GET, POST, PUT, DELETE, PATCH)
- Validate API responses
- Extract response data and reuse it in UI test steps
- Build end-to-end scenarios combining API + UI automation
When to Use API Automation with Codeless
API integration using custom scripts is recommended when:
- Backend APIs must be validated before UI actions
- Test data needs to be created dynamically via APIs
- UI depends on API response data
- End-to-end workflows require backend verification
Prerequisites
Before using API automation with codeless tests:
- Required API libraries must be added using Import Statements
- API endpoint details (URL, headers, payload) should be available
Step-by-Step: Using API with Codeless Automation
Step 1: Open Codeless Generator
- Navigate to Automation → Codeless
- Open an existing test case or create a new one
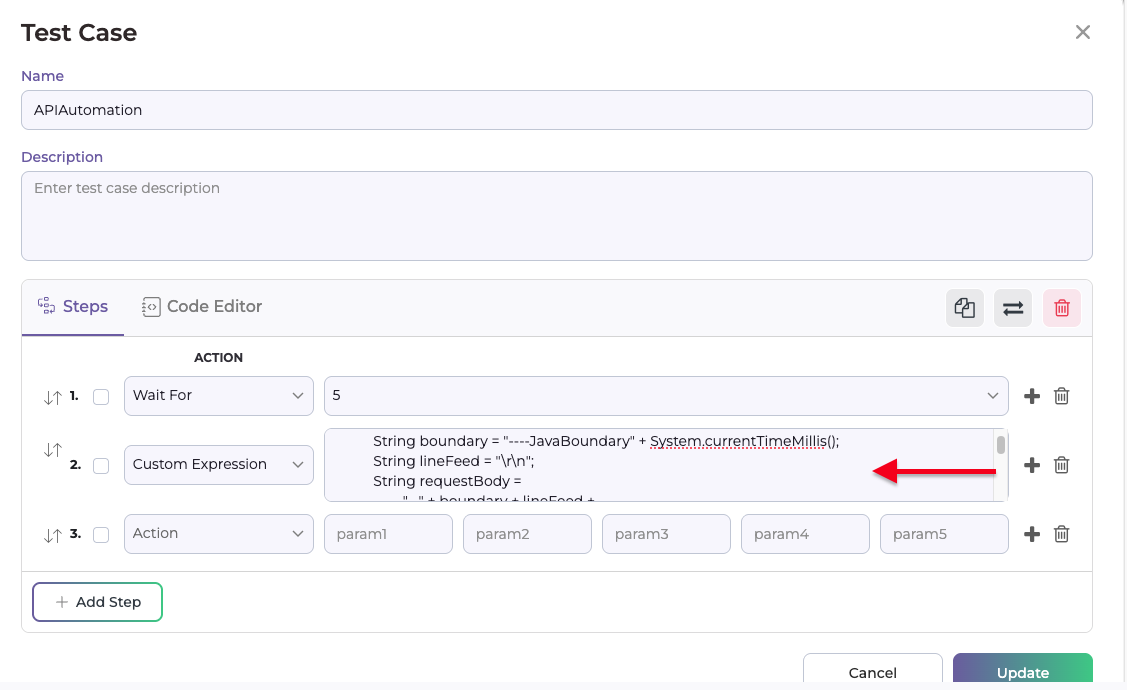
Step 2: Write API Request in Custom Script
- Select Custom Script as the action type and add you api
String url = "TG API URl";
String userToken = "TD token";
String deviceid = "TG device ID";
String Cookie = "_testgrid=xyz; ci_session=xyy";
String boundary = "----JavaBoundary";
String lineFeed = "\r\n";
String requestBody =
                "--" + boundary + lineFeed +
                        "Content-Disposition: form-data; name=\"user_token\"" + lineFeed + lineFeed +
                        userToken + lineFeed +
                        "--" + boundary + lineFeed +
                        "Content-Disposition: form-data; name=\"device_id\"" + lineFeed + lineFeed +
                        deviceid + lineFeed +
                        "--" + boundary + "--" + lineFeed;

        HttpRequest request = HttpRequest.newBuilder()
                .uri(URI.create(url))
                .header("Content-Type", "multipart/form-data; boundary=" + boundary)
                .header("Cookie", Cookie)
                .POST(HttpRequest.BodyPublishers.ofString(requestBody))
                .build();

        try {
            HttpClient client = HttpClient.newHttpClient();
            HttpResponse<String> response = client.send(request, HttpResponse.BodyHandlers.ofString());

            System.out.println("Status Code: " + response.statusCode());
            System.out.println("Raw Response: " + response.body());

        ObjectMapper mapper = new ObjectMapper();
        Map<String, Object> rootMap = mapper.readValue(response.body(), Map.class);
        Map<String, Object> dataMap = (Map<String, Object>) rootMap.get("data");

        System.out.println("Device Name : " + dataMap.get("deviceName"));
        System.out.println("UDID        : " + dataMap.get("udid"));

        boolean anyFlagSet = false;

        for (Map.Entry<String, Object> entry : dataMap.entrySet()) {
            String key = entry.getKey();
            Object value = entry.getValue();

            if (key.startsWith("is_") && value != null && "1".equals(value.toString())) {
                anyFlagSet = true;
                System.out.println("FLAG SET TO 1 : " + key);
            }
        }

        if (!anyFlagSet) {
            System.out.println("No is_* flags are set to 1");
        }
        } catch (IOException | InterruptedException e) {
            e.printStackTrace();
        }
Step 3: Add Required Import Statements & Maven Dependency
Navigate to Import Statements and add required imports, for example:
import java.net.HttpURLConnection;
import java.net.URL;
import java.io.BufferedReader;
import java.io.InputStreamReader;
Navigate to Maven Dependency and add required Dependency, for example:
<dependency>
   <groupId>io.rest-assured</groupId>
   <artifactId>rest-assured</artifactId>
   <version>5.4.0</version>
   <scope>test</scope>
</dependency>
These allow API requests to be executed within the custom script.
For Reference : https://testgrid.io/docs/document/add-a-import-statements-and-custom-libraries-in-version-suites/
Step 4: Continue UI Automation
- After API execution, proceed with standard codeless steps:
- Click
- Enter Text
- Validate UI elements
- This creates a complete API + UI end-to-end test flow
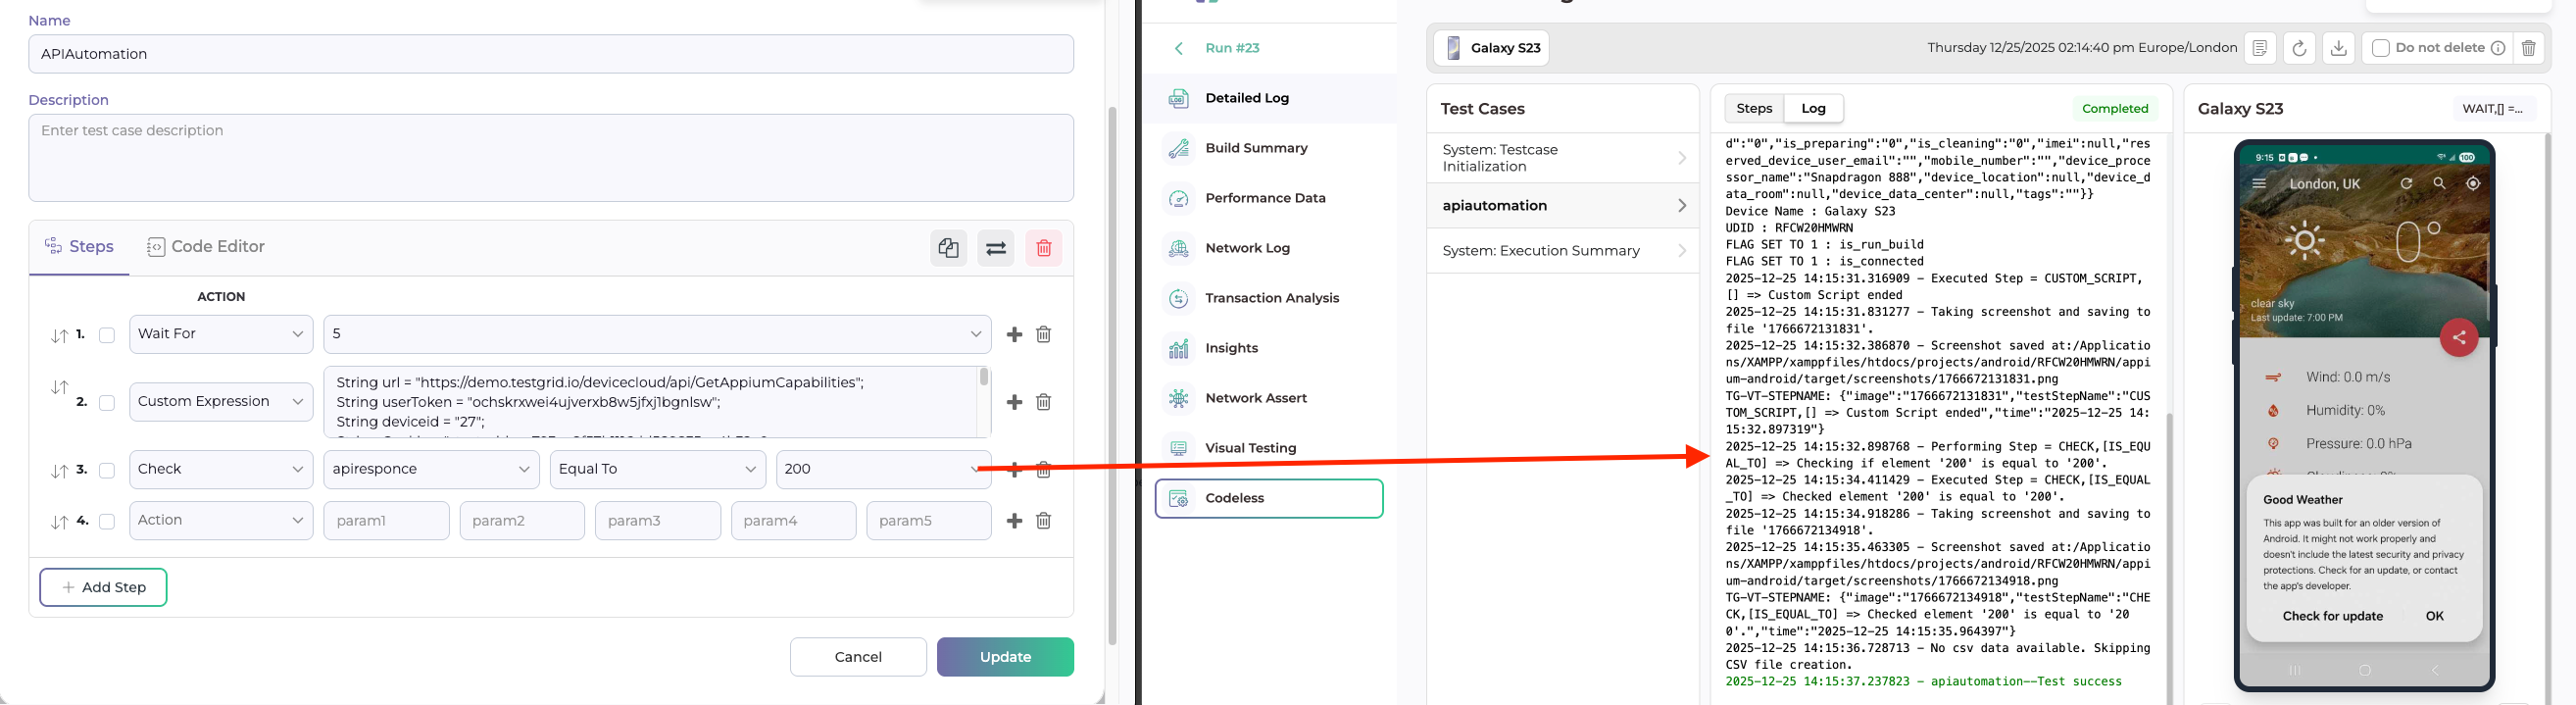
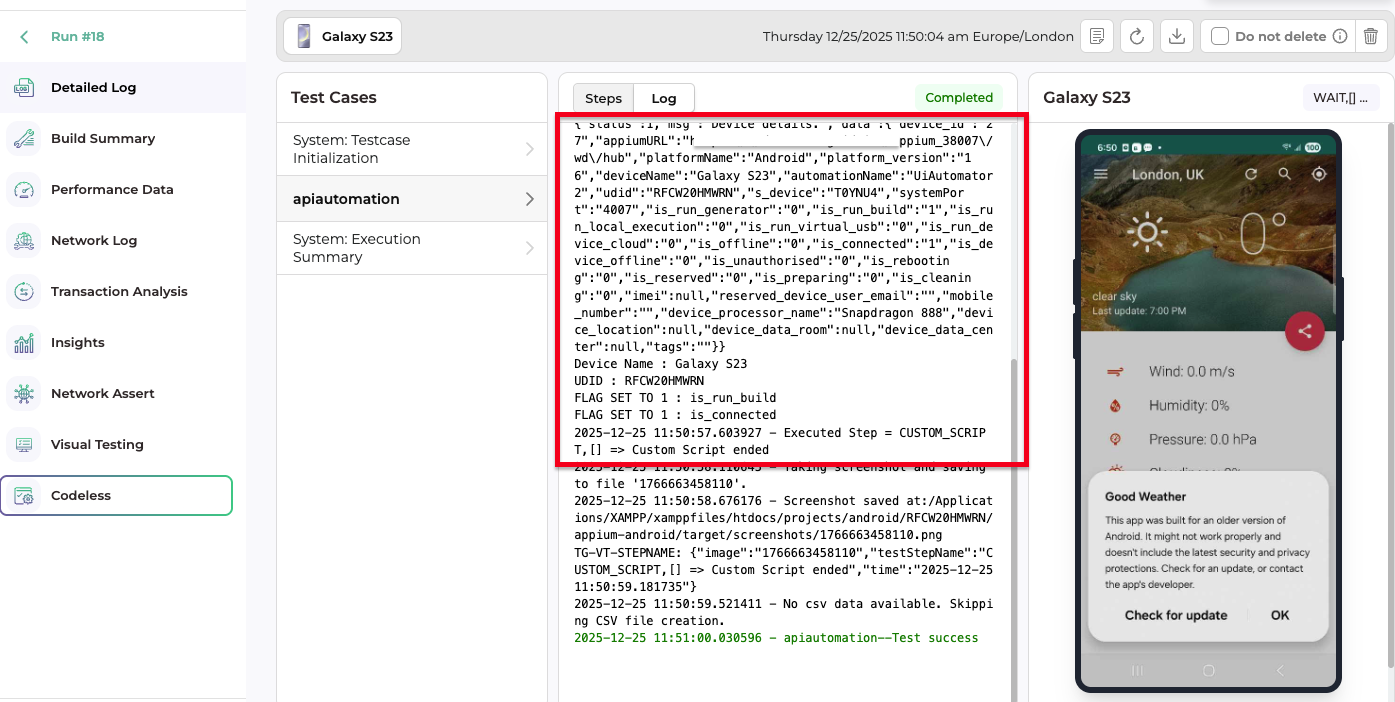
Execution and Reporting
During execution, TestGrid provides:
- Step-wise execution logs
- Console output from custom scripts
- Screenshots and video recordings (if enabled)
All execution details are available in the Build Execution Details page.
Best Practices
- Validate API responses before proceeding to UI steps
- Handle response codes and exceptions properly
- Avoid hardcoding sensitive data (tokens, credentials)
- Use reusable API scripts where possible
- Combine API setup steps with UI validation for faster execution