XRay JIRA Integration with TestGrid
Overview
The TestGrid to Xray JIRA Integration enables seamless synchronization between your automated testing workflows and test management lifecycle. By bridging TestGrid’s Codeless + AI automation engine with JIRA Cloud, teams can link TestGrid test cases directly to Xray test issues, map release versions, and automatically push real-time execution results (such as Pass/Fail statuses and run histories) back into JIRA. This eliminates manual tracking, ensures end-to-end requirement traceability, and provides a unified single source of truth for your quality assurance metrics.
Pre-requisites
- JIRA Credentials for Integration: This includes the Personal Access Token, Client Secret etc.
Step 1: Accessing the Integrations Settings
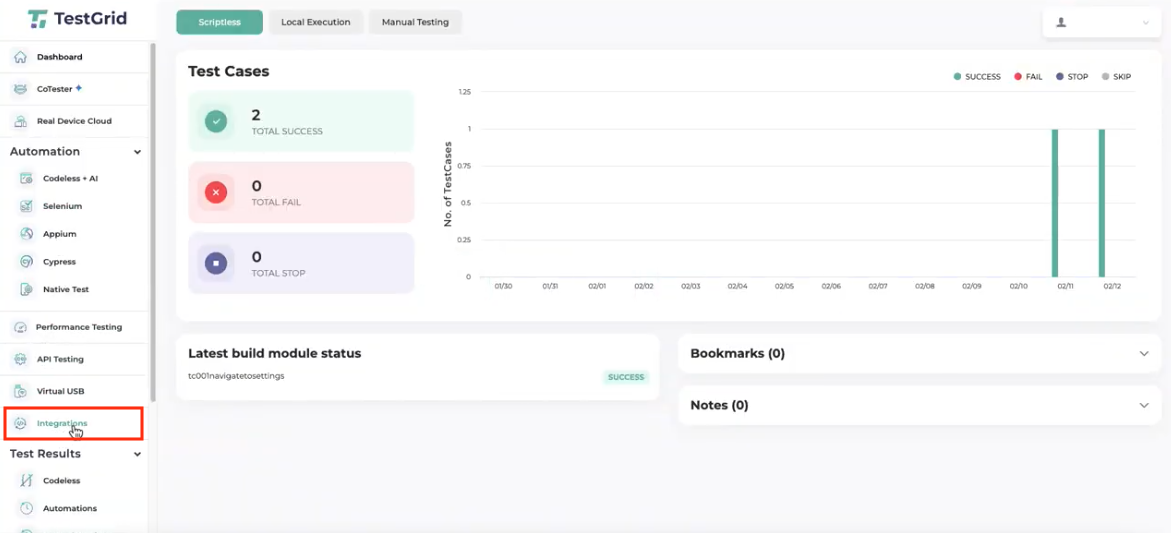
- Log In: Navigate to the TestGrid portal and log in using your valid account credentials.
- Navigate to Integrations: Once inside the main dashboard, look at the left-hand sidebar menu. Scroll down to the bottom section and click on the Integrations option.
Step 2: Selecting the Jira Integration
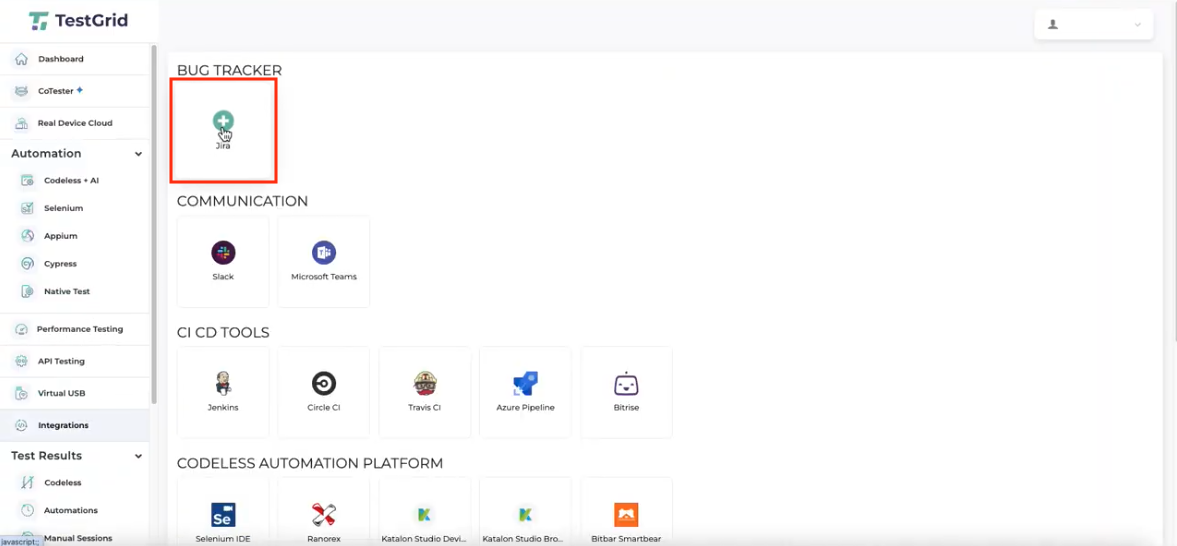
- On the Integrations dashboard, locate the BUG TRACKER category at the top of the page.
- Click on the Jira integration block (marked by a plus
+icon) to initiate the setup wizard.
Step 3: Configuring and Installing the Jira Integration
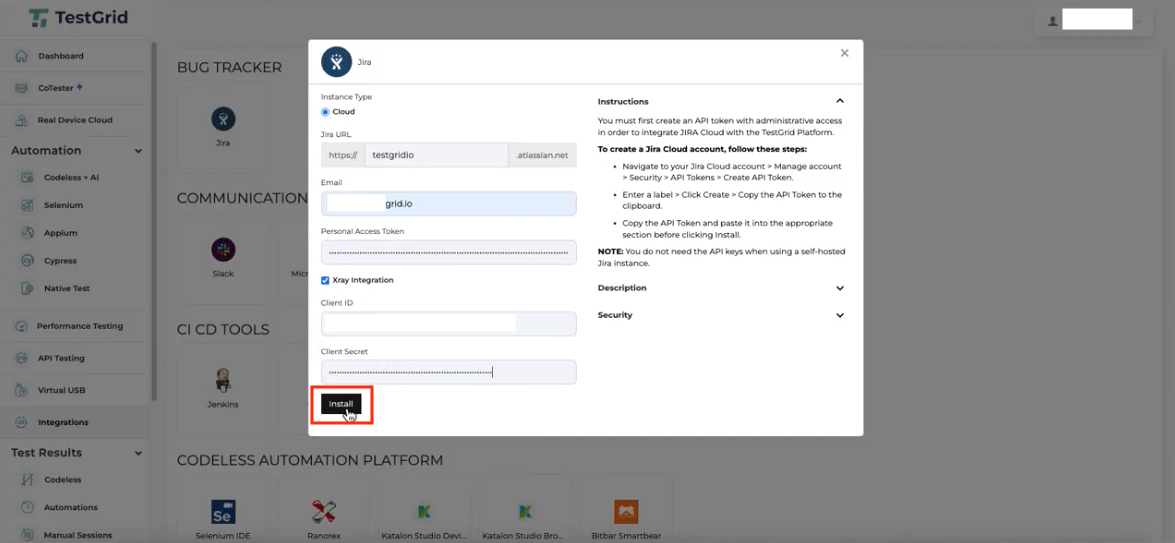
- In the Jira configuration modal that appears, enter the following required connection details:
- Instance Type: Select Cloud (or your appropriate instance type).
- Jira URL: Enter your organization’s Jira domain prefix (e.g.,
testgridio). - Email: Provide the email address associated with your administrative Jira Cloud account.
- Personal Access Token: Paste the API token generated from your Jira Cloud security settings.
- Check the Xray Integration checkbox to enable Xray-specific configuration fields.
- Provide the additional credentials required for Xray:
- Client ID
- Client Secret
- Review your inputs and click the Install button located at the bottom-left corner of the modal window.
Step 4: Selecting and Integrating Projects
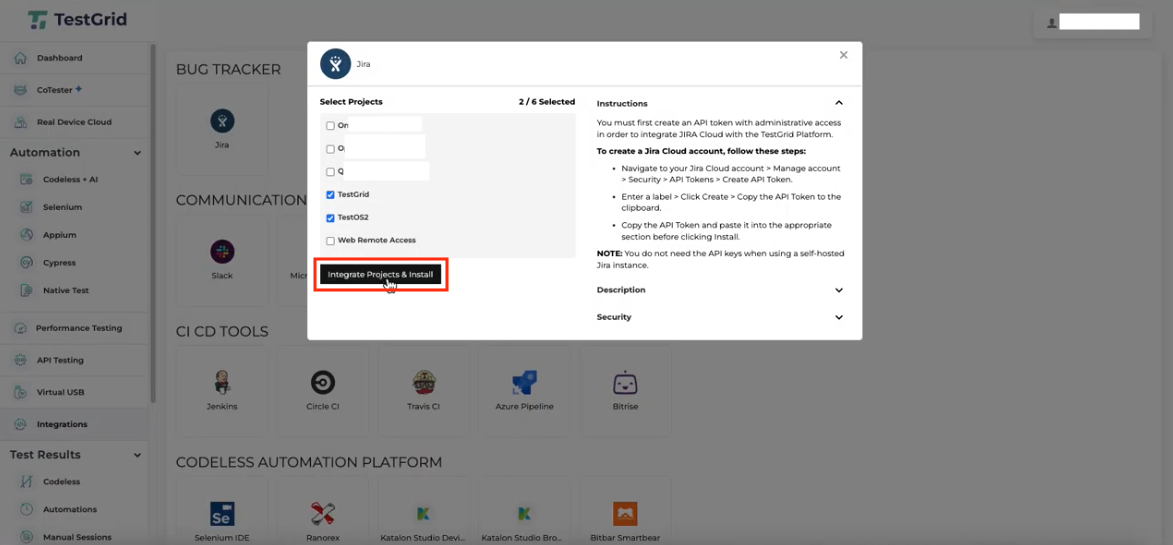
- Under the Select Projects section in the modal, view the list of available Jira projects fetched from your instance.
- Select the checkbox next to the specific project(s) you want to integrate with TestGrid (e.g.,
TestGrid,TestOS2). - Click the Integrate Projects & Install button at the bottom-left corner of the modal window to complete the project mapping.
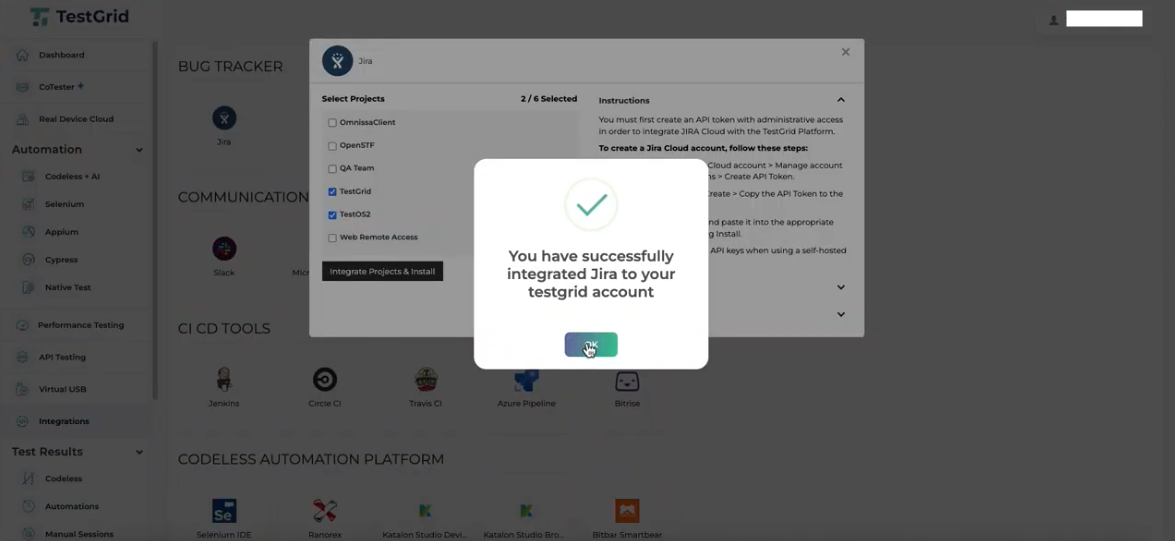
- A confirmation popup will appear stating “You have successfully integrated Jira to your testgrid account”. Click OK to close the prompt.
Step 5: Navigating to Project Configuration
- From the left-hand sidebar menu under the Automation dropdown, click on Codeless + AI.
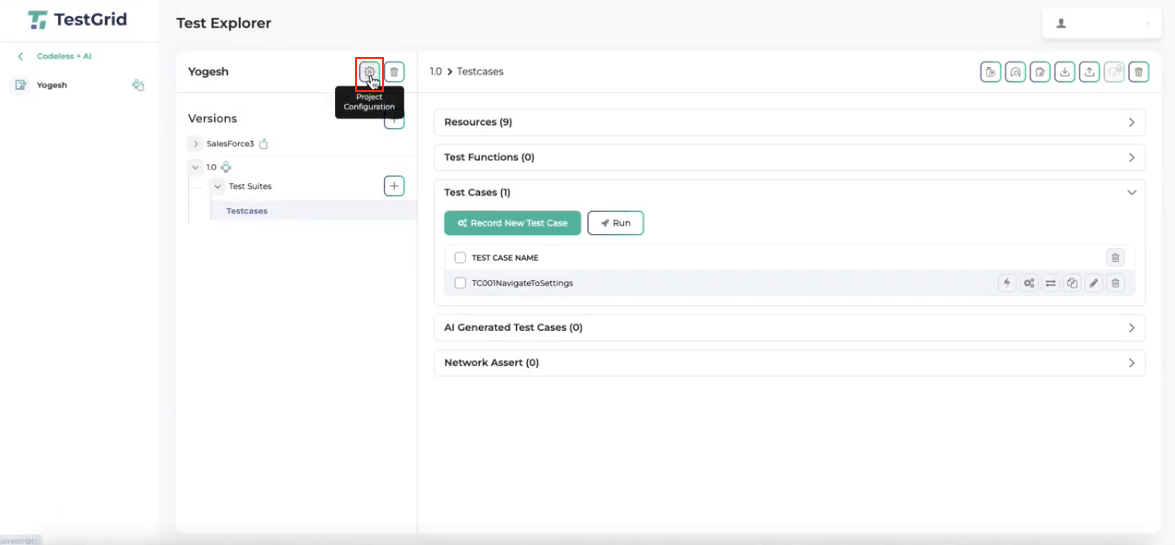
- Select your specific project from the list (e.g.,
Yogesh). - Locate the gear icon next to your project title in the Test Explorer panel and click on Project Configuration.
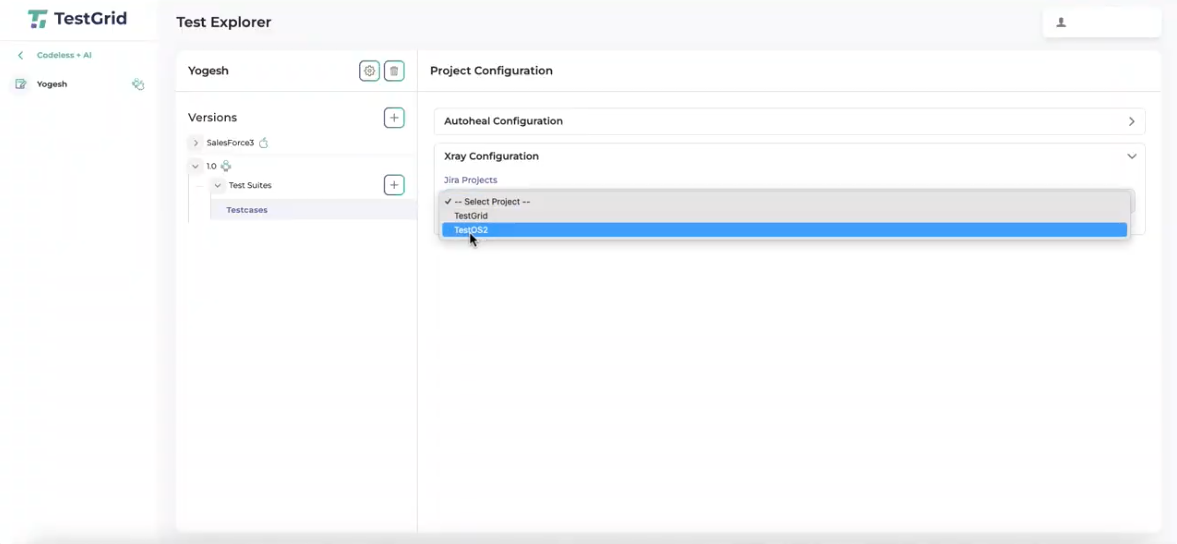
Step 6: Mapping the Jira Project to Your TestGrid Project
- Inside the Project Configuration view, expand the Xray Configuration section.
- Click on the Jira Projects dropdown menu.
- Choose the specific integrated Jira project (e.g.,
TestOS2) that you want to map to this TestGrid project.
Step 7: Configuring Jira Project Versions
- Upon successfully selecting the project, a green SUCCESS! Successfully project update. confirmation toast will appear in the top-right corner of the interface.
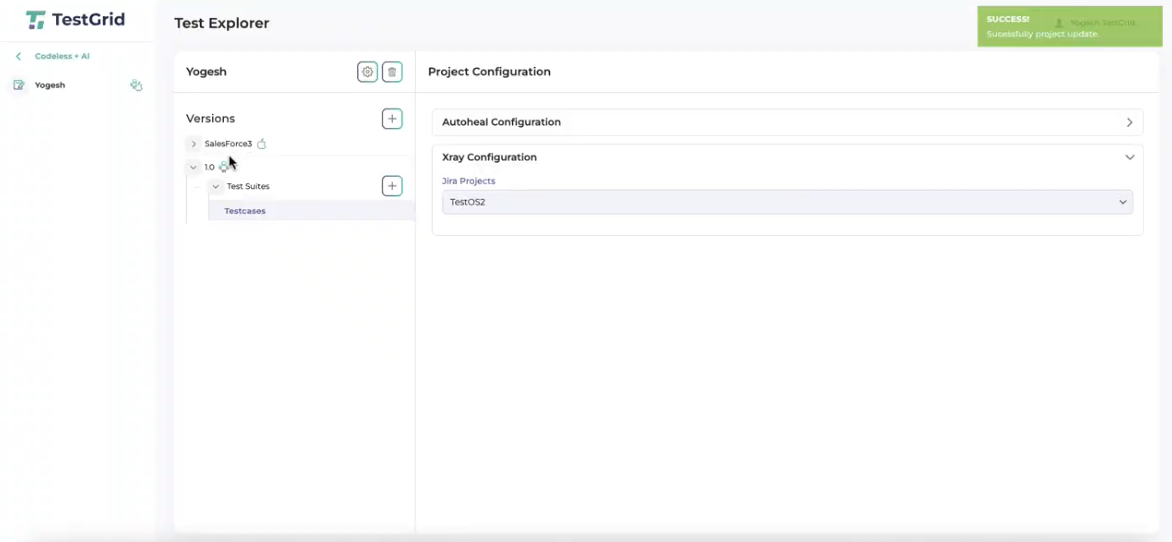
- In the left-hand panel under the Versions list, select the specific version name (e.g.,
1.0). - In the Edit version modal that opens, look for the Jira Project Versions dropdown menu.
- Click the dropdown and select the corresponding Jira version designation (e.g.,
TestOSV2.001) to map it to your TestGrid project version.
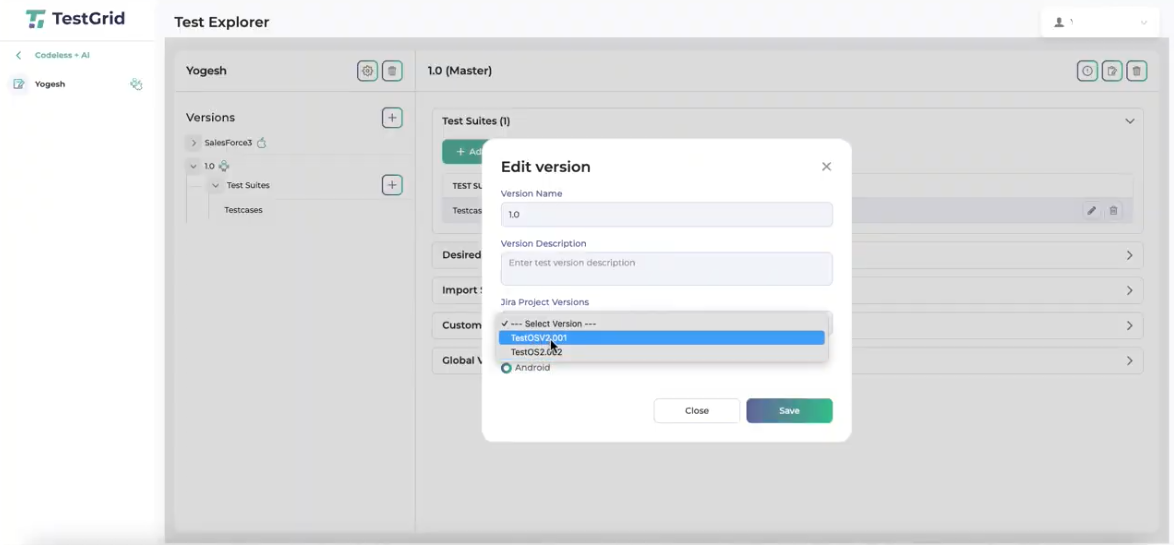
- Click Save to apply the configuration.
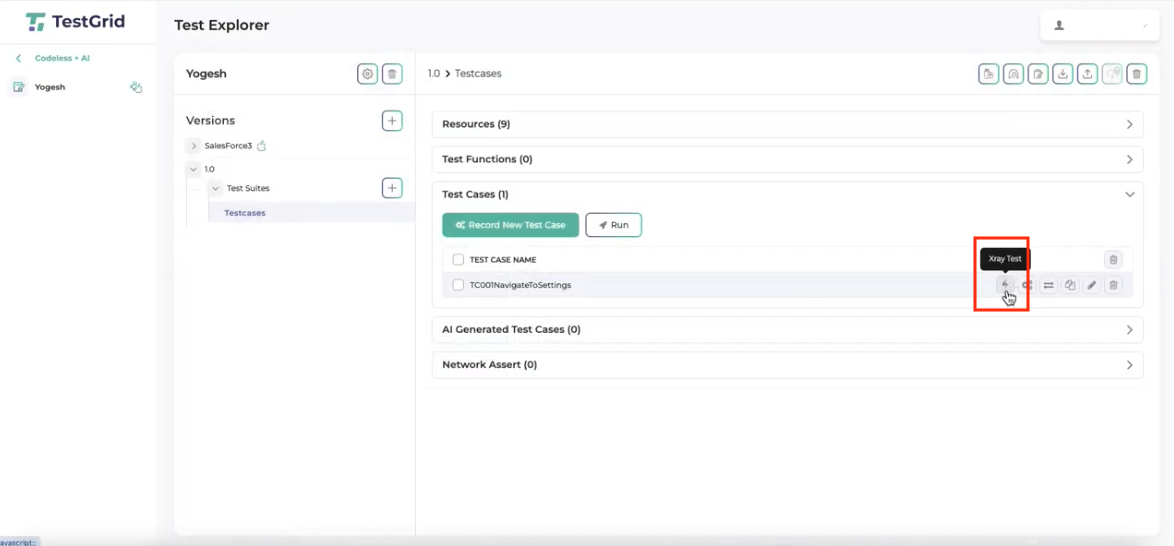
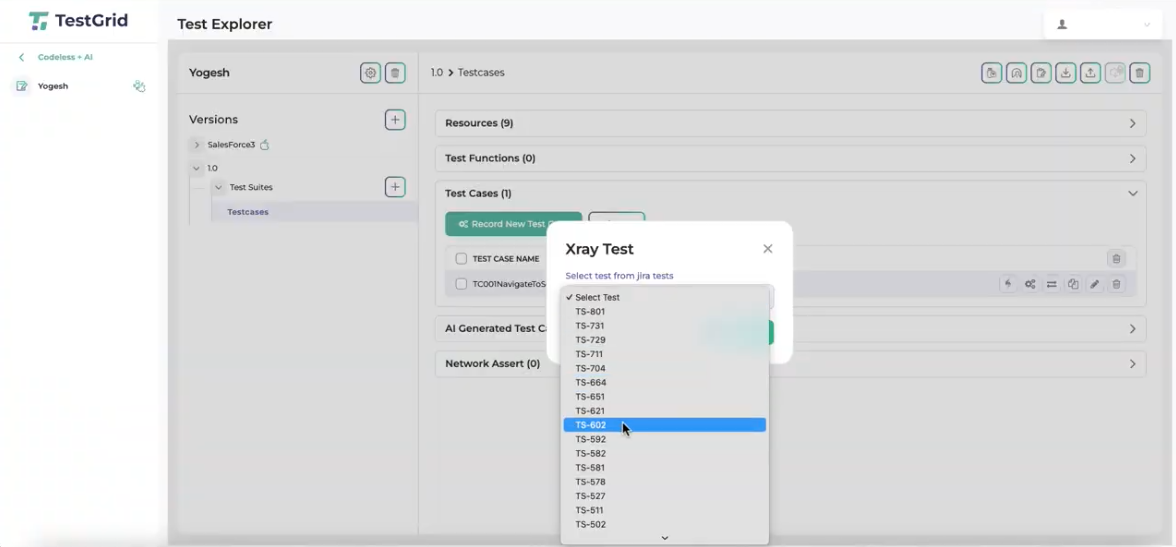
Step 8: Mapping Individual Test Cases to Xray Tests
- Expand the Test Cases dropdown section within your Test Explorer view.
- Locate your specific test case row (e.g.,
TC001NavigateToSettings). On the right side of the test case row, click the Xray Test action icon (represented by a lightning bolt symbol).
- An Xray Test modal will appear over the interface. Click on the Select test from Jira tests dropdown list and choose the designated Jira test issue key (e.g.,
TS-602) that matches your test scenario. Click the save button to submit.
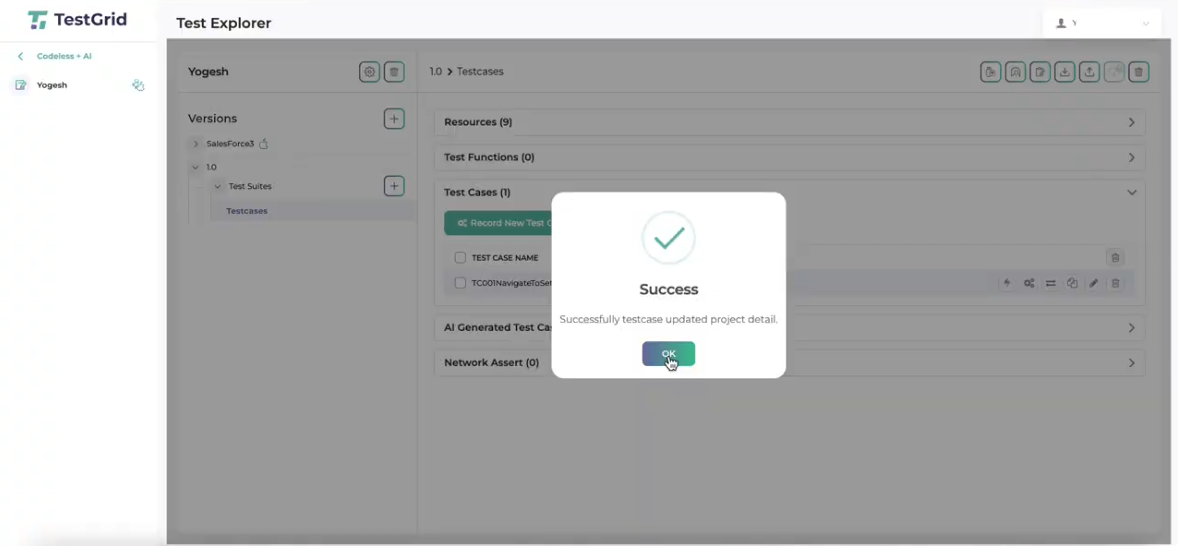
- Upon clicking save, a Success confirmation dialog box will pop up stating “Successfully testcase updated project detail.” Click the OK button to finalize the mapping and dismiss the window.
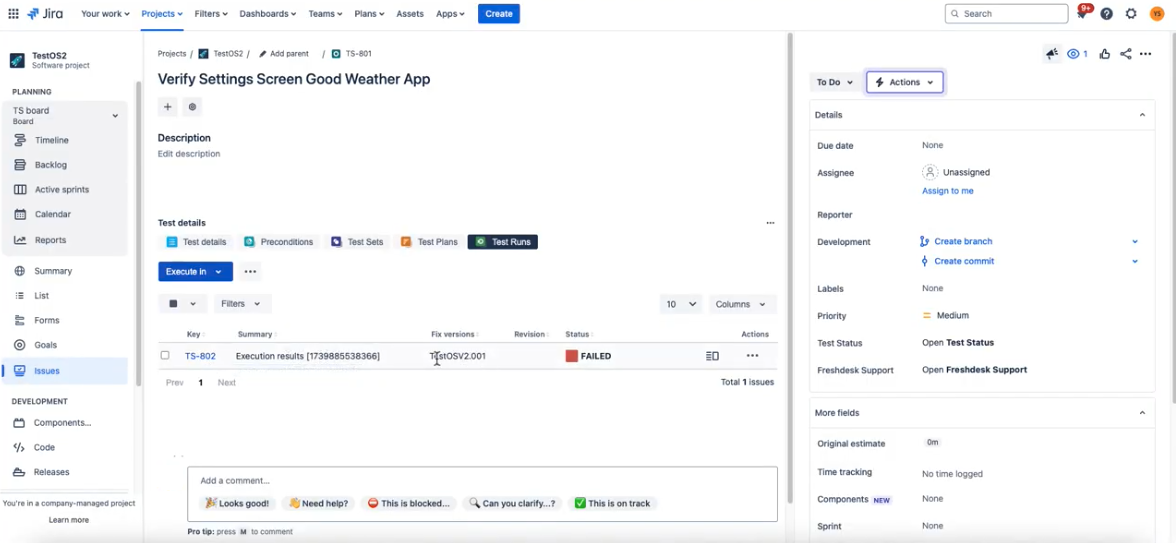
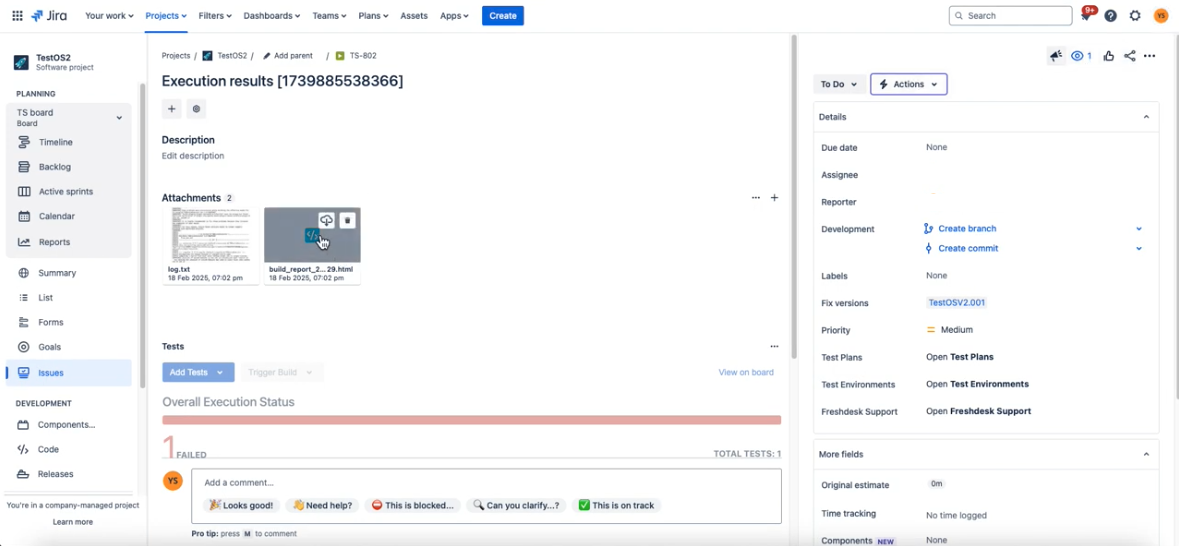
Step 9: Executing Test Cases and Verifying Results in Jira
- Execute your test cases within TestGrid. Once the run finishes, navigate to your execution dashboards. The run data logs directly into the system execution results to confirm the platform processed the automated script.
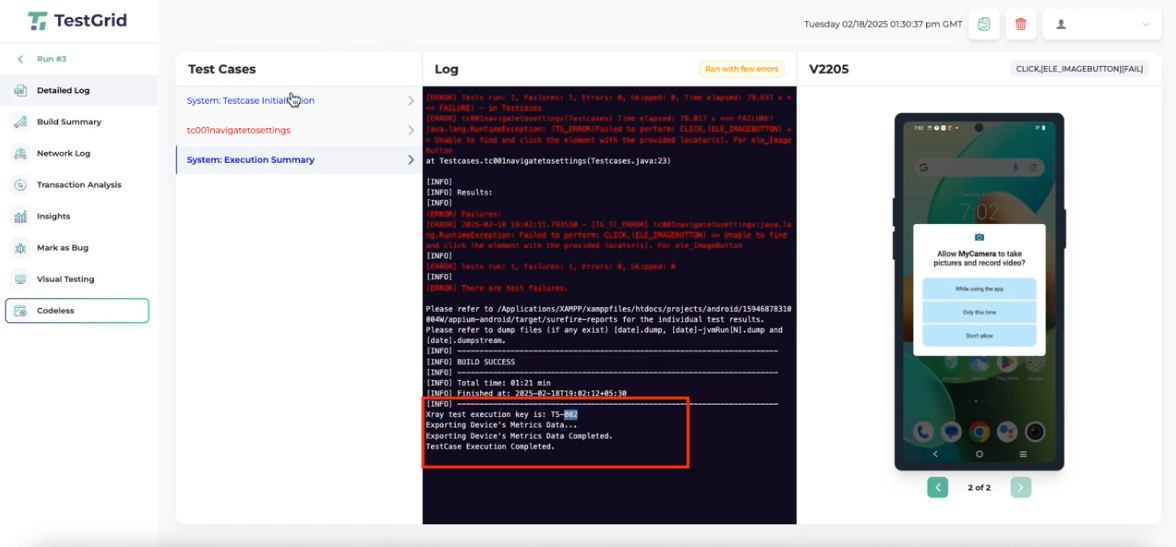
- Because the test cases are synchronized, the real-time execution statuses (such as PASSED, FAILED, or execution run histories) automatically post back to your connected project. You can view these updated statuses directly within the Jira issue interface under the specialized panels.