
TG Connect (TG-Tunnel): Securely Connect Your Local/Low Environment to the TestGrid Device Cloud
Overview:
TG Connect (also called TG-Tunnel) creates a secure, encrypted VPN tunnel between your local, hosted, or internal environment and the TestGrid Real Device Cloud. It lets real devices and cloud browsers reach an application that isn’t publicly accessible such as localhost, a staging app behind a firewall, or an internal tool, without exposing it to the internet.
TestGrid supports industry-standard encryption protocols, including IPsec and SSL/TLS, to protect data in transit. All traffic between your machine and the Device Cloud is encrypted end-to-end, maintaining confidentiality, integrity, and authenticity, so even if traffic were intercepted, it would remain unreadable.
This guide covers what to do before, during, and after a TG Connect session, common pitfalls to avoid, and how concurrent sessions are handled.
Prerequisites:
Before setting up the tunnel, make sure you have:
- Valid TestGrid login credentials with access to TG Connect.
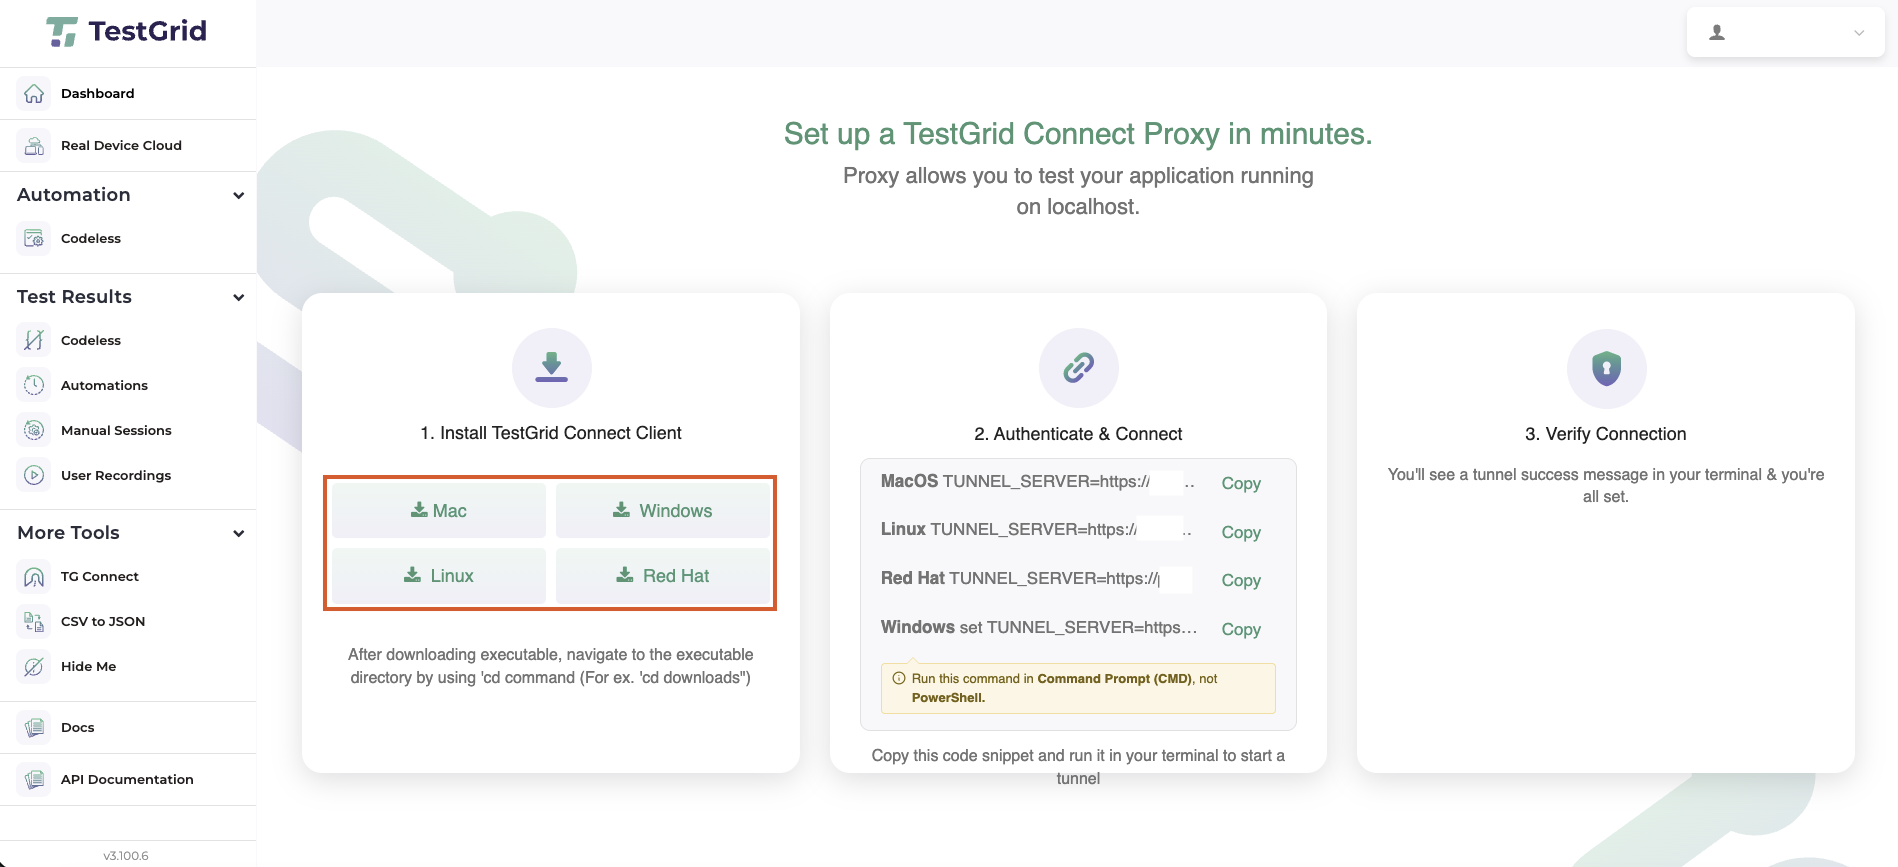
- The TG Connect executable downloaded for your operating system (Dashboard → More Tools → TG Connect).
- Terminal/command-line access to run the tunnel command.
- Your local or lower, hosted, or production application is up, running, and reachable from your own machine before you start the tunnel.
Setting Up the Tunnel
Step 1: Log in to the TestGrid portal with your credentials.
Step 2: Open the tunnel executable
Open a terminal and navigate to the directory where you unzipped the TG Connect executable:
cd <path_of_downloaded_executable_file>
Step 3: Start the tunnel
From the Dashboard, go to More Tools → TG Connect, copy the command generated for your operating system, and run it in your terminal. It will look similar to:
TUNNEL_SERVER=https://{your_domain}.testgrid.io/tunnel API_KEY={API-KEY-on-TG-Command} ./client connect
Step 4: Confirm the tunnel is live
Wait for a confirmation message in the terminal, such as:
Tunnel established successfully tunnel_id=tun_{ID} server_port={port}
&&
Starting heartbeat loop interval=30s source=default
Heartbeat sent successfully tunnel_id=tun_{ID}
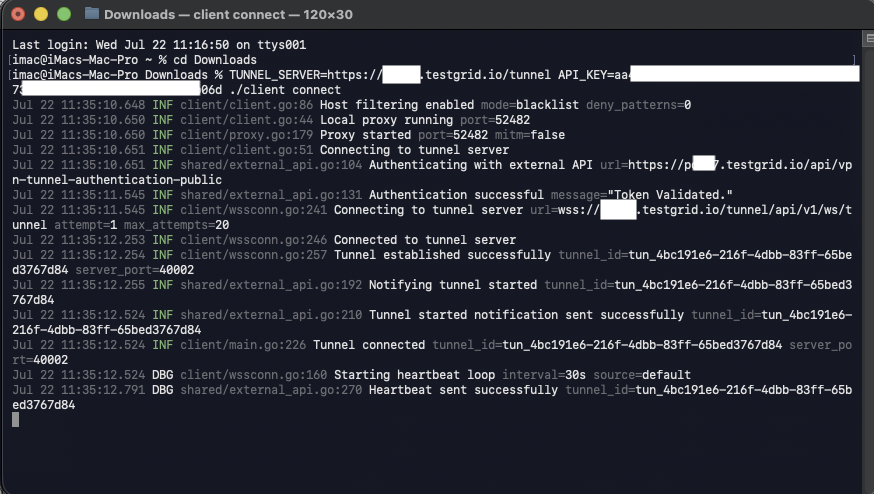
Along with a steady heartbeat. This confirms secure tunneling is active between your machine and the TestGrid Device Cloud. Note the IP address or domain of your local/hosted environment — you’ll enter this on the device once connected.
Step 5: Connect a device or browser
Go to Real Device Cloud and open the device or browser session you want to test on.
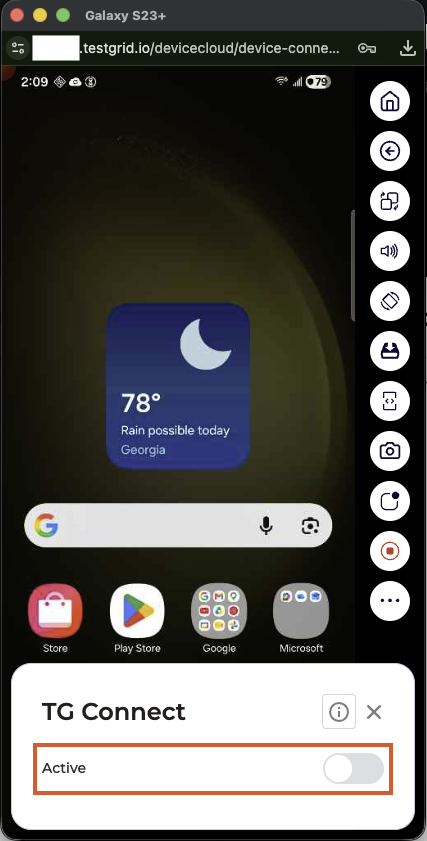
- Devices (Android/iOS): Click the three-dot menu in the bottom-right corner of the device screen, find TG Connect, and toggle it on.
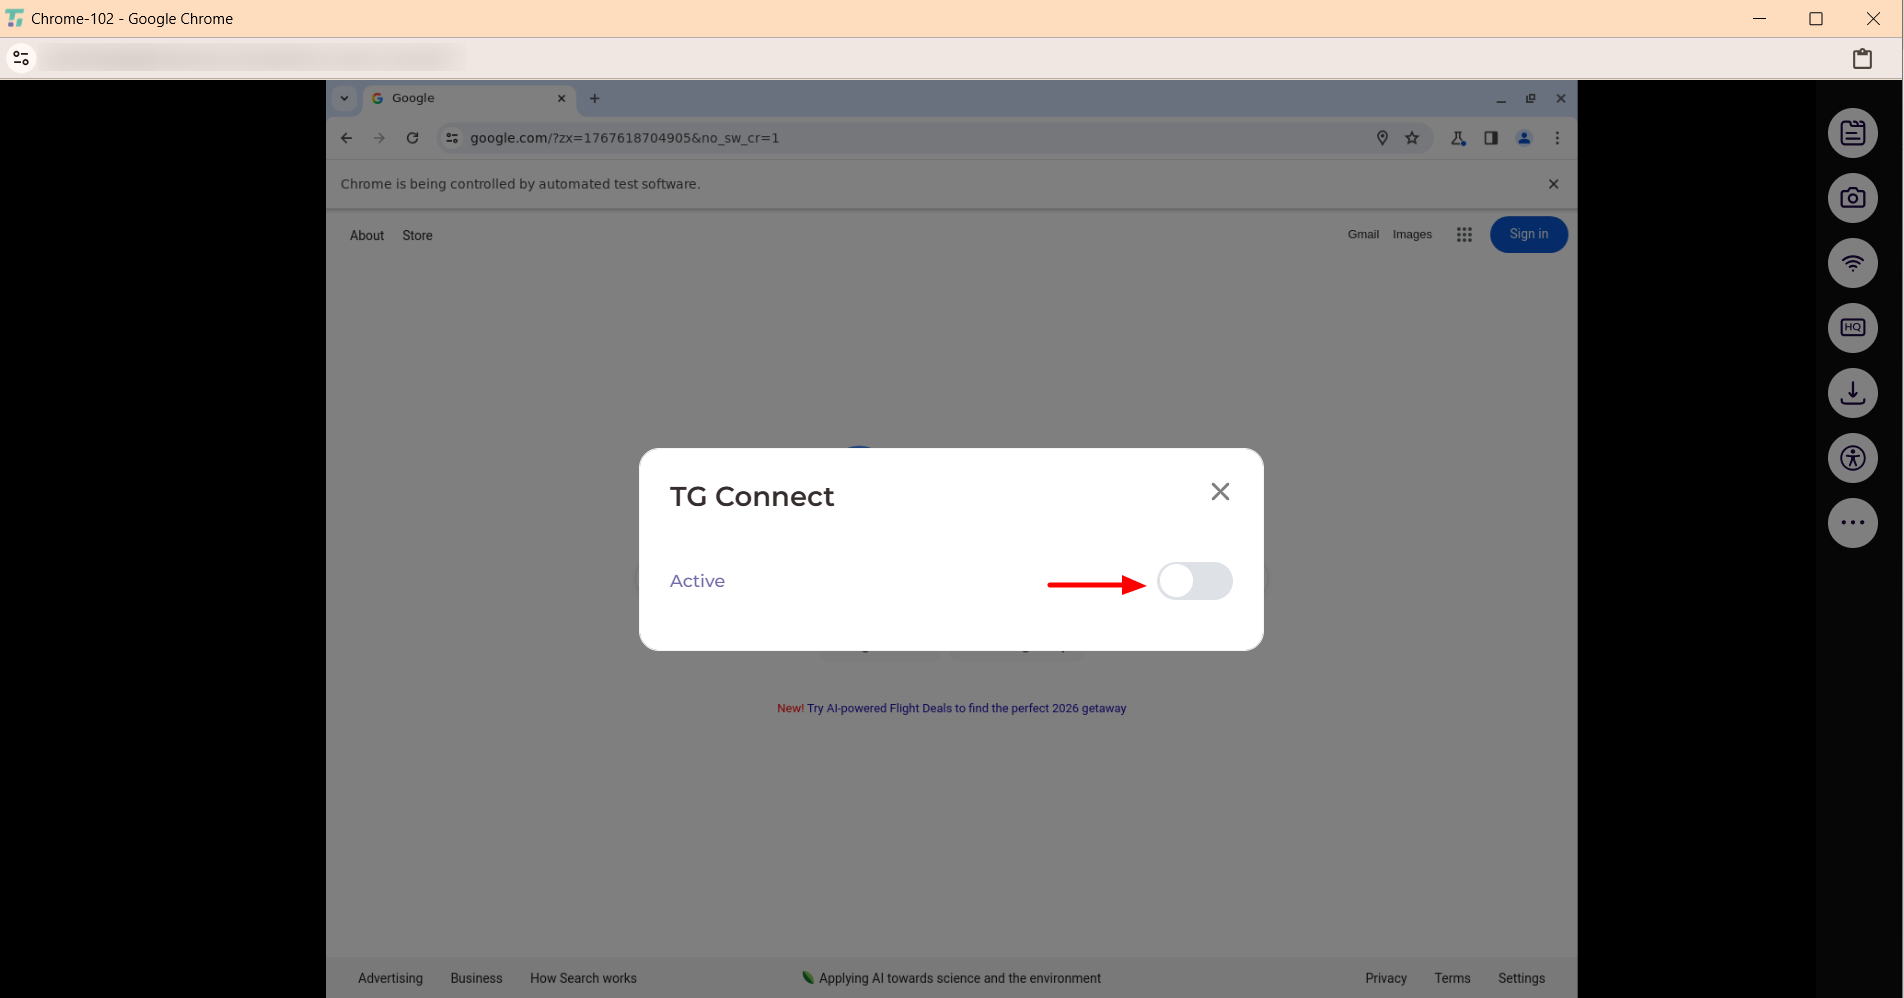
- Cloud browsers: Open the browser session, click the bottom-right menu, find TG Connect, and toggle it on.
- Scriptless/Codeless runs: On the Browser/Device Selection screen, tick “Connect with your local environment” after selecting your device.
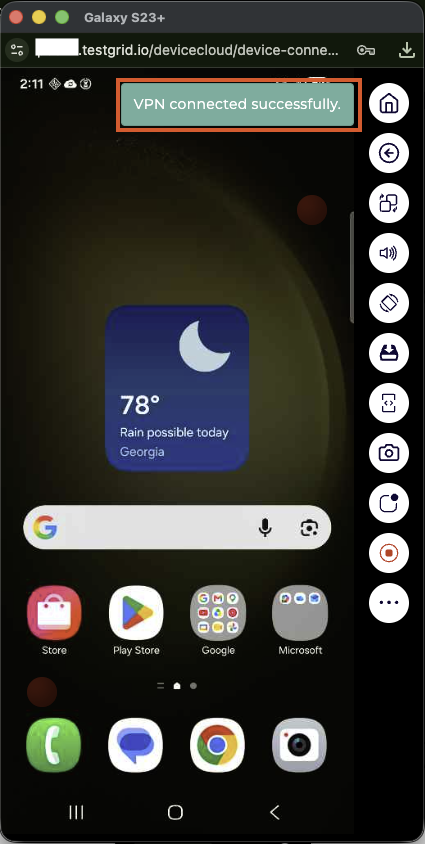
Once the proxy finishes configuring, confirm you see a “VPN Connected Successfully” (or “VPN Set Successfully”) message in the top corner of the screen.
Step 6: Access your environment
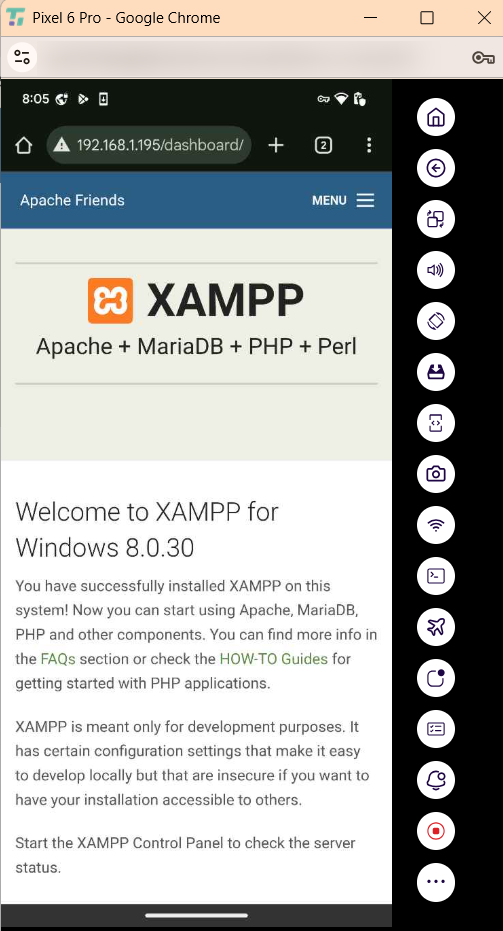
- On mobile, make sure the device’s Wi-Fi is enabled, then open Chrome (or your debug/production app) and enter your local/hosted URL.
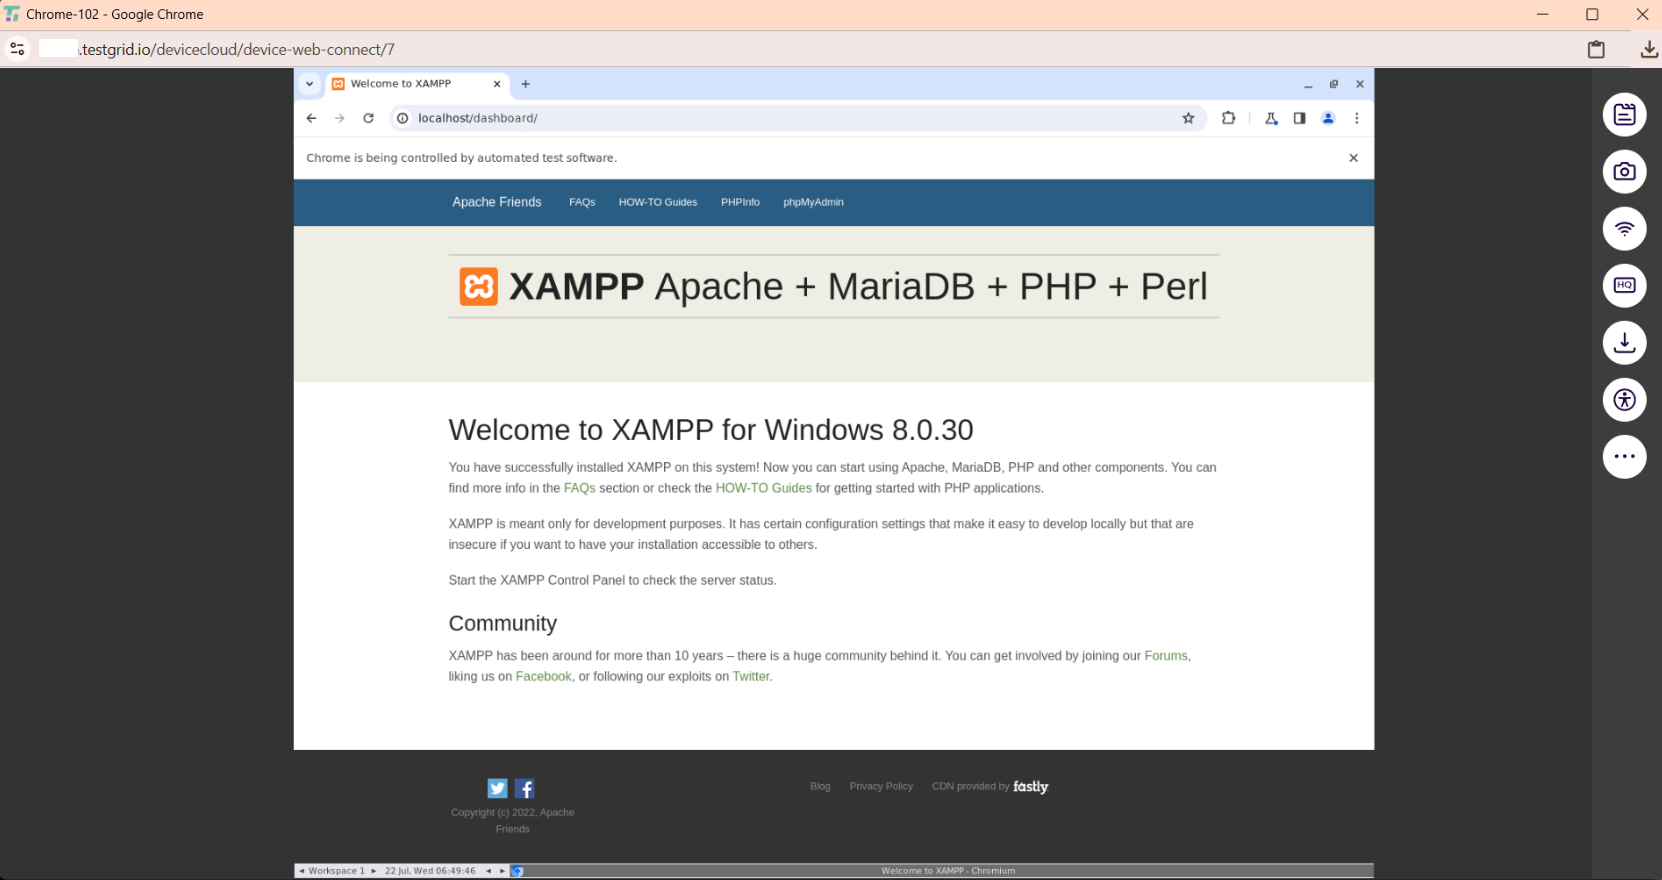
- On cloud browsers, open a new tab and enter your local environment’s URL.
You can now interact with your local environment through the TestGrid Device Cloud.
4. Best Practices — What To Do
✔ Start the TG Connect tunnel first, and only enable the device/browser VPN proxy after the terminal confirms tunneling has started.
✔ Keep your machine and network stable for the entire session — avoid interruptions, restarts, or connectivity drops during recording, generation, or execution.
✔ Keep the TG Connect terminal window open and running for the full duration of your session.
✔ Confirm your local/internal application is reachable from your own machine before routing a device through the tunnel.
✔ Use Chrome for Codeless test execution, the Test Case Generator, and manual testing UI — this is the only supported browser for these flows.
✔ Use a stable URL/port for your local environment; avoid changing it mid-session.
✔ When you’re done, stop the tunnel (Ctrl/Cmd + C) and turn off the VPN/proxy on every device or browser that used it.
5. What Not To Do
✖ Don’t close the TG Connect terminal window while a session, recording, or execution is active.
✖ Don’t restart, sleep, or hibernate your machine during execution.
✖ Don’t enable the device/browser VPN before the tunnel has fully started.
✖ Don’t change your machine’s network (switch Wi-Fi, connect/disconnect a personal VPN, move between networks) while the tunnel is active.
✖ Don’t let the network sit idle or drop for an extended period while the tunnel is in use.
✖ Don’t use a browser other than Chrome for Codeless execution, Test Case Generator, or manual testing UI.
✖ Don’t leave the device/browser VPN proxy on after your session ends — disable it so the device returns to its normal network.
✖ Don’t frequently change the local port or URL mid-session.
6. Running Multiple Sessions
TG Connect supports multiple users running isolated tunnels simultaneously, so different people can test different environments at the same time without conflicts.
The one constraint is per environment: only one active TG Connect session can be connected to a specific local environment at a time. If a second person needs to access the same local environment, the current user must first disconnect their tunnel. Once that session ends, the next person can start their own TG Connect session and connect to that environment.
7. Ending a Session
- In the terminal running TG Connect, press
Ctrl(orCmd)+ Cto terminate the tunnel. - Turn off the VPN on the device: open SocksDroid on Android or Potatso on iOS.
- Disable the TG Connect toggle on any browser session that used it.
- Confirm the device or browser has reconnected to its normal Wi-Fi/mobile network before starting any other test.
8. Where TG Connect Is Used
- Codeless Generator — enable via the “Connect with your local environment” checkbox on the Browser/Device Selection screen.
- Test Case Execution — select “Connect with your local environment” on the Browser/Device Selection screen before running.
- Common use cases — testing on
localhost, staging apps behind a firewall, internal tools, and recording flows before public release.